> ## Documentation Index
> Fetch the complete documentation index at: https://docs.getmonita.io/llms.txt
> Use this file to discover all available pages before exploring further.
# Set Up Global Monitoring - Android Kotlin SDK
> This is a step by step guide to setup and manage Monita Global Monitoring Setup/Manage Global Monitoring for Android Kotlin
Global Monitoring is an Enterprise feature, which enables companies to agnostically monitor network requests departing your client.
### Instructions
1. Click 'New Domain' and your domain and select the Monitoring Tab
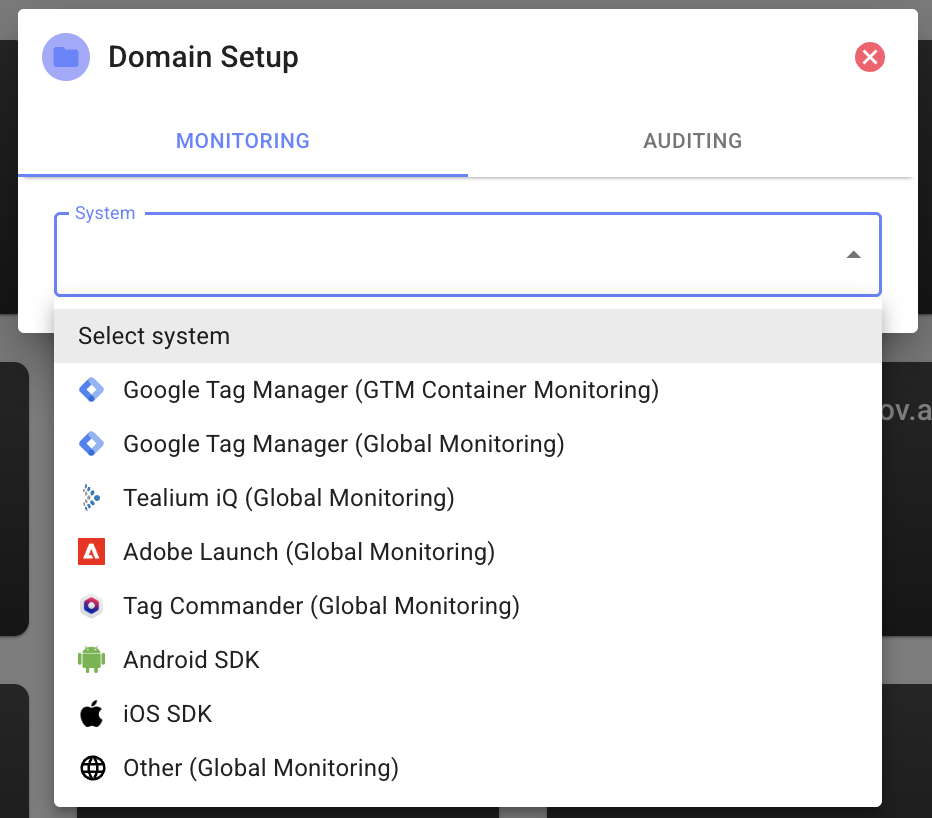 2. Select Android SDK or Global Monitoring (Use Global if you would like to use the same Domain for both web and mobile)
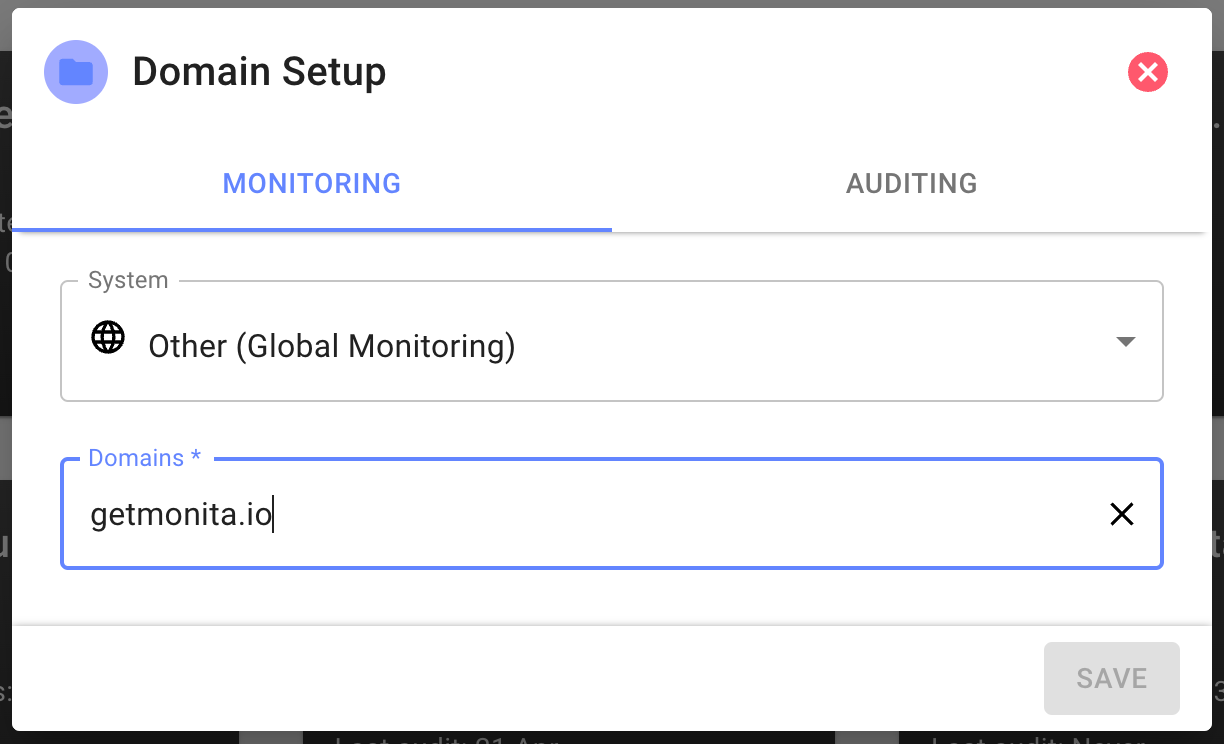
3. Next provide the Domain you wish to ingest events from and press enter (you can add subdomains here)
2. Select Android SDK or Global Monitoring (Use Global if you would like to use the same Domain for both web and mobile)
3. Next provide the Domain you wish to ingest events from and press enter (you can add subdomains here)
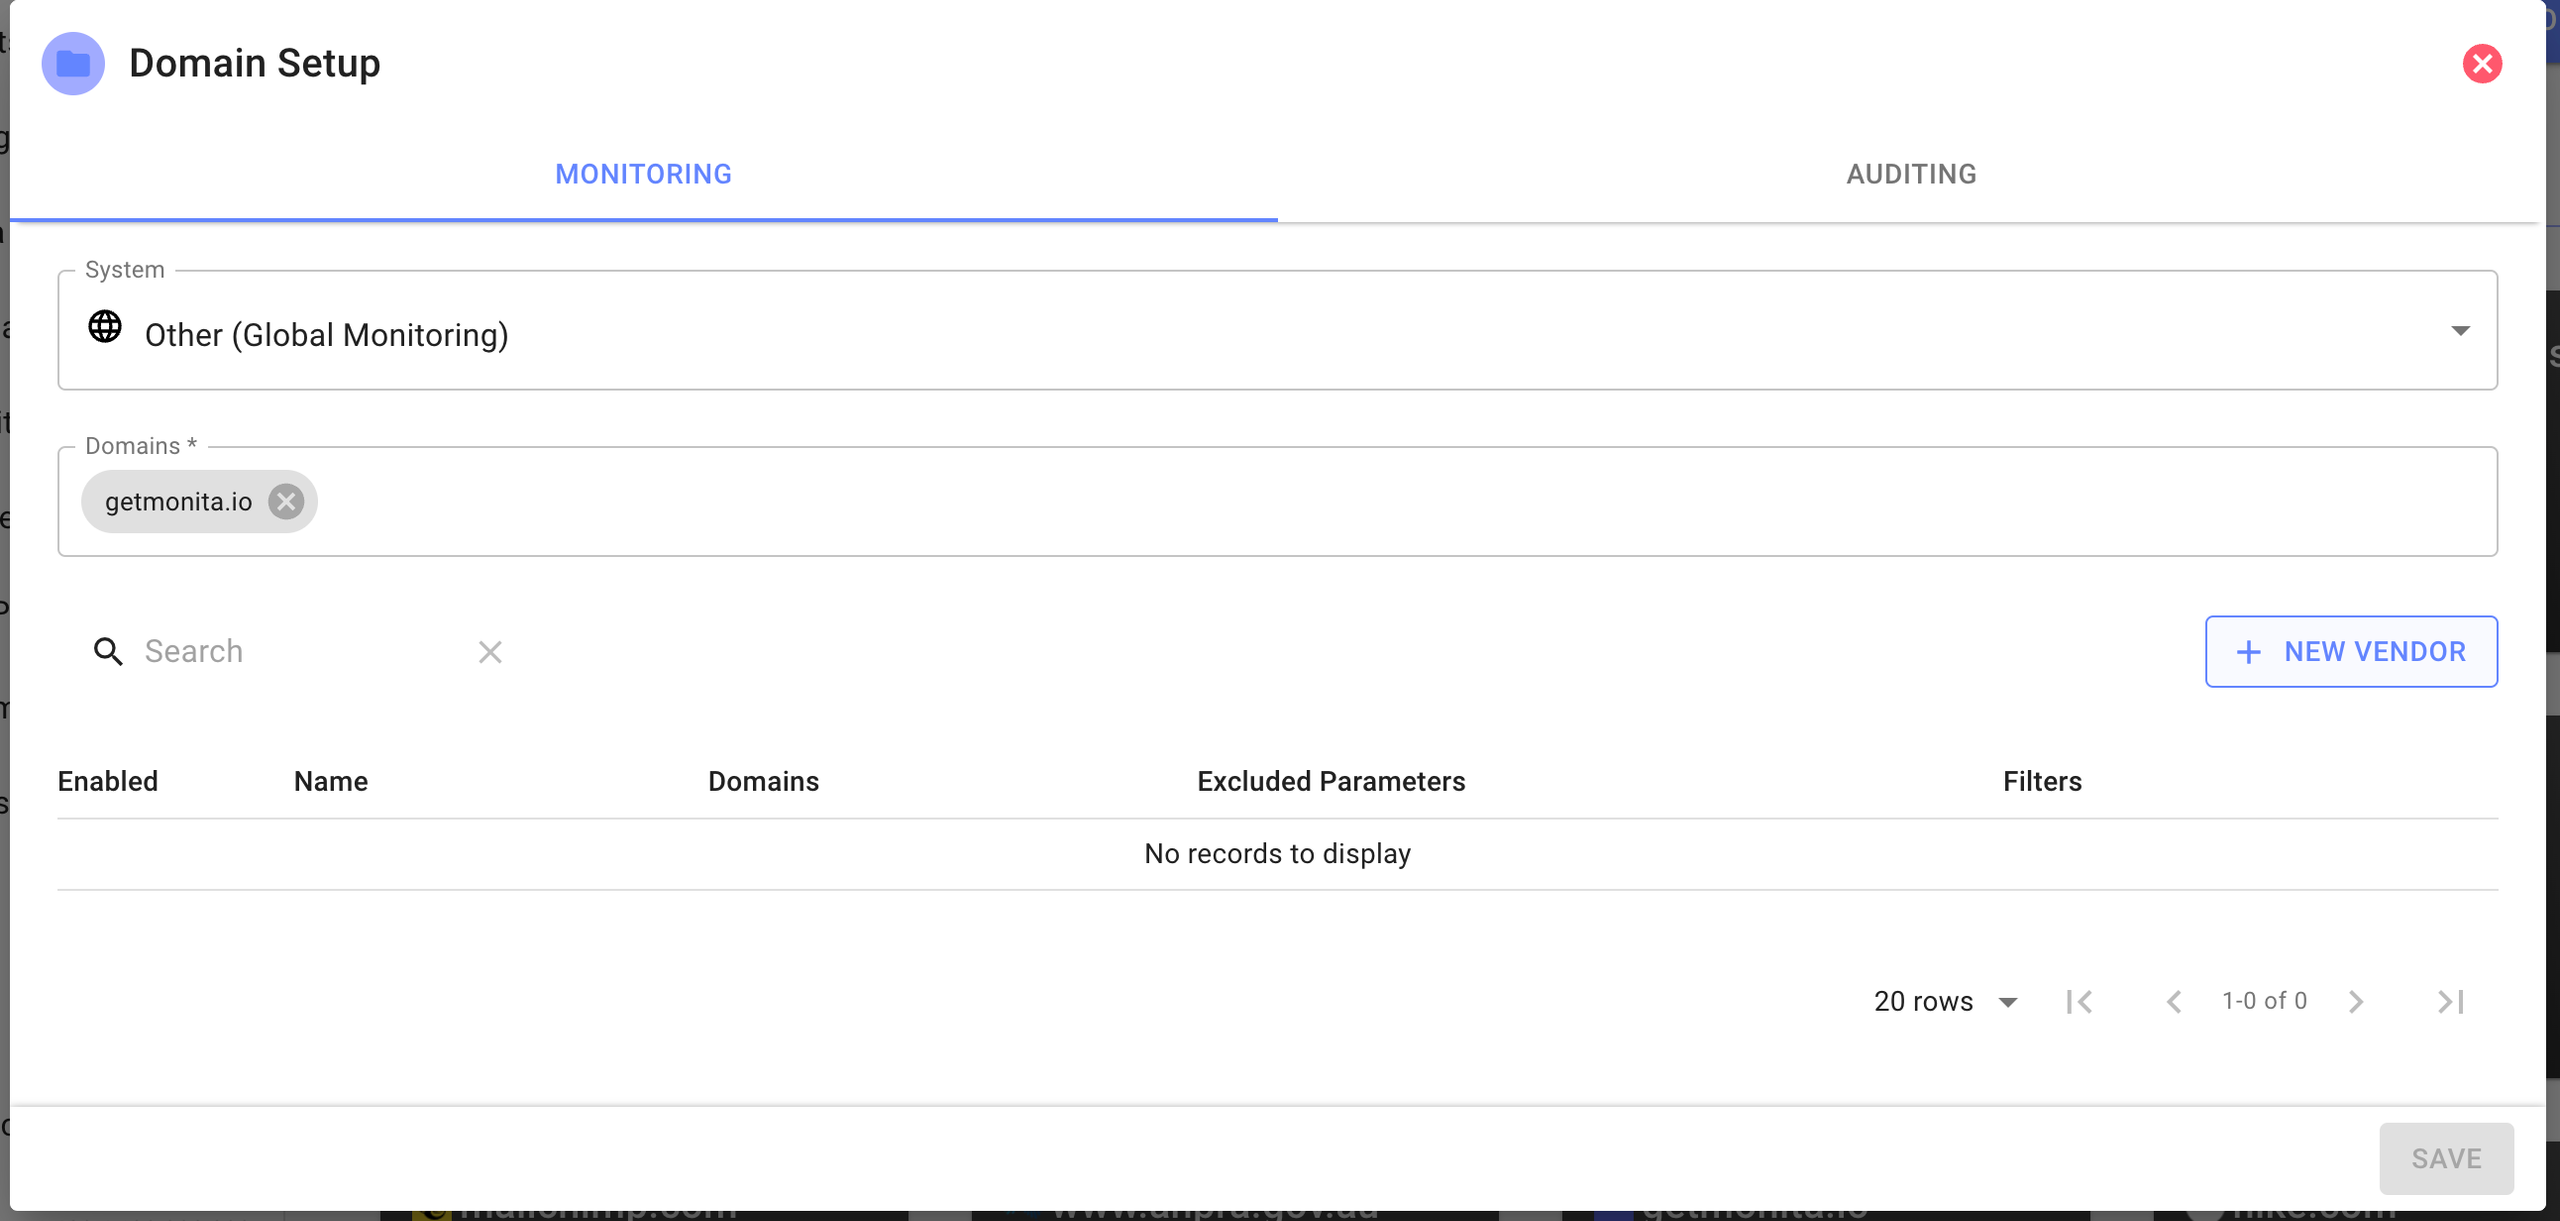
 4. Start adding Vendors by Clicking new Vendor
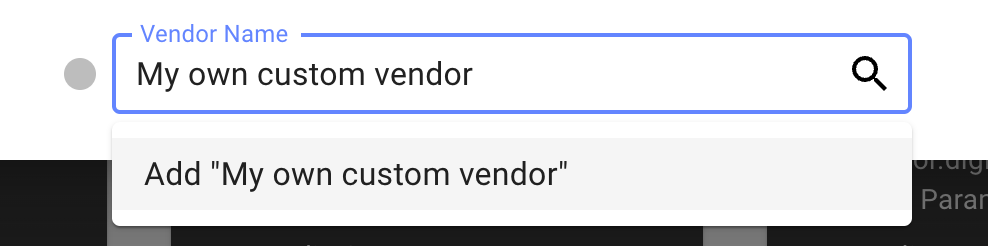
 5. Search for an existing Vendor or create a Custom Vendor
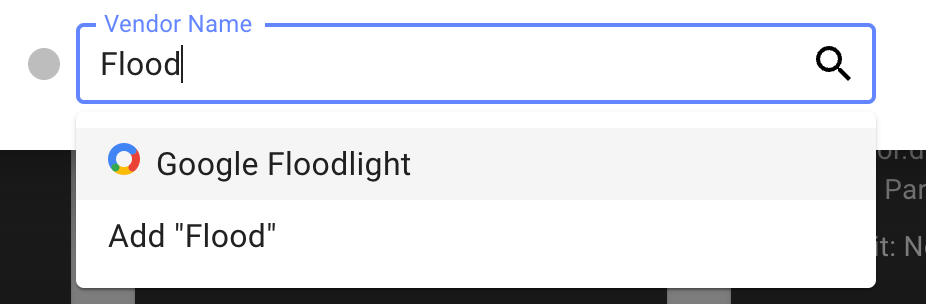 6. Fill in the Monitoring Form for the specific Vendor you have Chosen
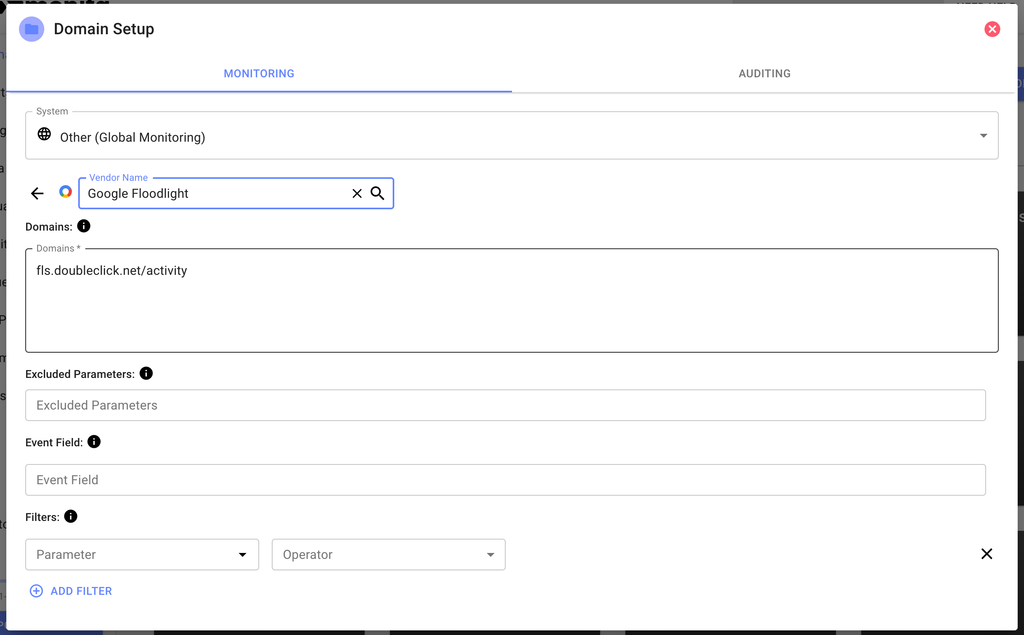 The form has several crucial fields to complete:
This is the domain which client side pixel/tag requests are sent to.
Typically known as the request URL e.g. for Facebook, "facebook.com/tr".
Use this field to specify which keys you would like to exclude from monitoring. e.g. Facebook sends an "sw" parameter with screen width. If you don't want/need to monitor that key, enter it here.
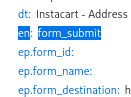
Used to specify which key in the vendors payload corresponds to the event name.
You can specify either a single field by name, or multiple fields inside curly braces e.g. `{{fieldA}}-{{fieldB}}`. Here is an example request with the event in the "ev" parameter:
The form has several crucial fields to complete:
This is the domain which client side pixel/tag requests are sent to.
Typically known as the request URL e.g. for Facebook, "facebook.com/tr".
Use this field to specify which keys you would like to exclude from monitoring. e.g. Facebook sends an "sw" parameter with screen width. If you don't want/need to monitor that key, enter it here.
Used to specify which key in the vendors payload corresponds to the event name.
You can specify either a single field by name, or multiple fields inside curly braces e.g. `{{fieldA}}-{{fieldB}}`. Here is an example request with the event in the "ev" parameter:
 You can also extract a field value via regular-expression.
E.g. You may want to extract a sub-domain from a URL and add it to the event, this can be done by find inf the correct regex and applying it to the field parameter in the following format:
`regex::(?<=https:\/\/)[\w|-]*::url`
This format represents 3 sections, separated by double-colons (`::`). The 3 sections are:
* `regex` which inpforms the expression parser that the user is passing a regex expression
* `(?<=https:\/\/)[\w|-]*` is the regular expression itself (javascript regex supported. Test your regex in any regex editor such are [Regexr](https://regexr.com/))
* `url` is the field from which the content is extracted. You may use a dot (`.`) separated field path. (`url`, `host`, `method` and `vendorName` are automatically added to the payload)
The following execnt field `eve-{{regex::(?<=https:\/\/)[\w|-]*::url}}` (multiple digits) on value of field "myfield". In a payload `{ url: "https://subdomain.myapp.com" }`, the event field will be `eve-subdomain`.
Regular Expression allows for capturing text in relation to the existence of other text before it or after it. This is called [lookahead](https://developer.mozilla.org/en-US/docs/Web/JavaScript/Reference/Regular_expressions/Lookahead_assertion) and [lookbehind](https://developer.mozilla.org/en-US/docs/Web/JavaScript/Reference/Regular_expressions/Lookbehind_assertion)
Use this to focus your monitoring to specific vendor requests e.g. only where "ev" = "orderSuccess". This can also help reduce API call consumption.
7. After completing your Vendor Form press the Apply and then the Save button. To Manage simply enter this form again, edit and you will notice the Deployment Version at the bottom increment by 1.
You can also extract a field value via regular-expression.
E.g. You may want to extract a sub-domain from a URL and add it to the event, this can be done by find inf the correct regex and applying it to the field parameter in the following format:
`regex::(?<=https:\/\/)[\w|-]*::url`
This format represents 3 sections, separated by double-colons (`::`). The 3 sections are:
* `regex` which inpforms the expression parser that the user is passing a regex expression
* `(?<=https:\/\/)[\w|-]*` is the regular expression itself (javascript regex supported. Test your regex in any regex editor such are [Regexr](https://regexr.com/))
* `url` is the field from which the content is extracted. You may use a dot (`.`) separated field path. (`url`, `host`, `method` and `vendorName` are automatically added to the payload)
The following execnt field `eve-{{regex::(?<=https:\/\/)[\w|-]*::url}}` (multiple digits) on value of field "myfield". In a payload `{ url: "https://subdomain.myapp.com" }`, the event field will be `eve-subdomain`.
Regular Expression allows for capturing text in relation to the existence of other text before it or after it. This is called [lookahead](https://developer.mozilla.org/en-US/docs/Web/JavaScript/Reference/Regular_expressions/Lookahead_assertion) and [lookbehind](https://developer.mozilla.org/en-US/docs/Web/JavaScript/Reference/Regular_expressions/Lookbehind_assertion)
Use this to focus your monitoring to specific vendor requests e.g. only where "ev" = "orderSuccess". This can also help reduce API call consumption.
7. After completing your Vendor Form press the Apply and then the Save button. To Manage simply enter this form again, edit and you will notice the Deployment Version at the bottom increment by 1.
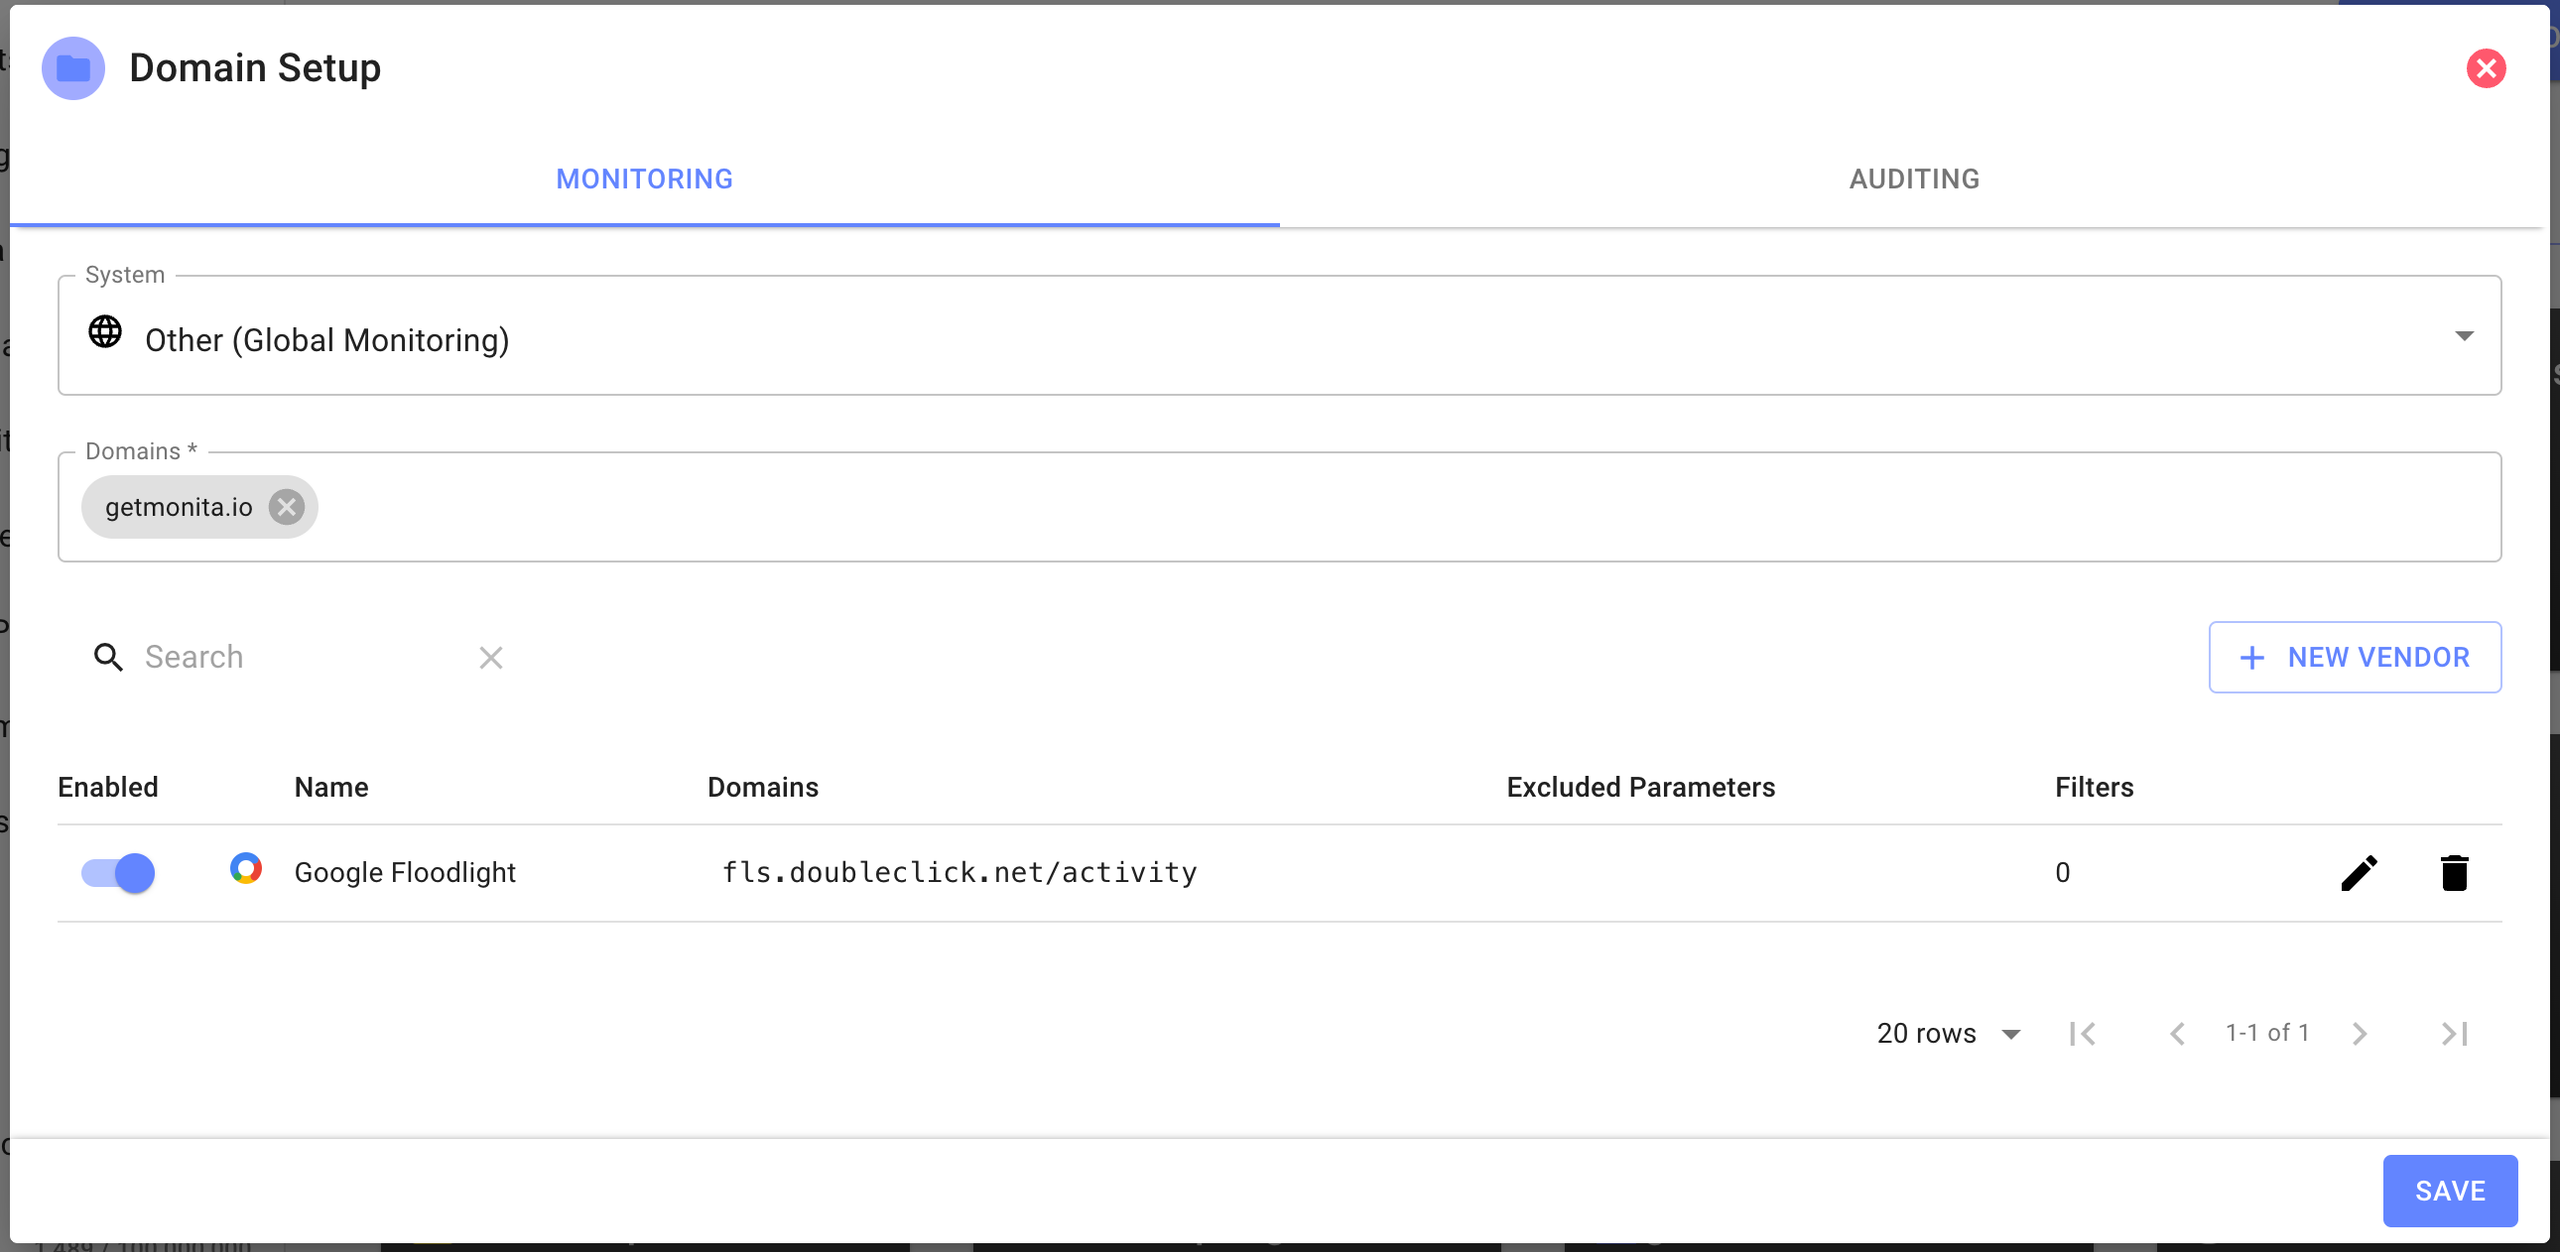 8. See the below Android Kotlin installation guide to install the Android SDK on your Kotlin App.
### Step 1: Add the JitPack Repository
Add the following lines to your root `settings.gradle.kts`:
```gradle theme={null}
dependencyResolutionManagement {
repositoriesMode.set(RepositoriesMode.FAIL_ON_PROJECT_REPOS)
repositories {
mavenCentral()
maven { url = uri("https://jitpack.io") }
}
}
```
### Step 2: Add the Dependencies
Include the Monita SDK and the Monita Adapter Library in your **module-level** `build.gradle.kts` or `build.gradle` file:
```gradle theme={null}
dependencies {
implementation ("com.github.rnadigital.monita-android-sdk:monita-android-sdk:v1.10.0")
implementation ("com.github.rnadigital.monita-android-sdk:monita-adapter-library:v1.10.0")
byteBuddy ("com.github.rnadigital.monita-android-sdk:monita-adapter-library:v1.10.0")
}
```
### Step 3: Byte Buddy Plugin Integration
Add the Byte Buddy Gradle plugin to your project by including the following in your `build.gradle.kts` or `build.gradle` file:
```gradle theme={null}
plugins {
id("net.bytebuddy.byte-buddy-gradle-plugin") version "1.15.5"
}
```
### Step 4: Sync the Project
Once you've added the dependencies, sync your project with Gradle by clicking **"Sync Now"** in Android Studio or running:
```bash theme={null}
./gradlew build
```
## Usage
After successful integration, you can initialize Monita SDK in your application class:
```kotlin theme={null}
import android.app.Application
import com.rnadigital.monita_android_sdk.MonitaSDK
class MyApplication : Application() {
val token = "fe041147-0600-48ad-a04e-d3265becc4eb"
override fun onCreate() {
super.onCreate()
MonitaSDK.Builder(this)
.enableLogger(true)
.setToken(token)
.setBatchSize(10)
.setCustomerId("123456")
.setConsentString("Granted")
.setSessionId("123456")
.setAppVersion("1.0")
.build {
// Callback when initialization is complete
}
}
}
```
8. See the below Android Kotlin installation guide to install the Android SDK on your Kotlin App.
### Step 1: Add the JitPack Repository
Add the following lines to your root `settings.gradle.kts`:
```gradle theme={null}
dependencyResolutionManagement {
repositoriesMode.set(RepositoriesMode.FAIL_ON_PROJECT_REPOS)
repositories {
mavenCentral()
maven { url = uri("https://jitpack.io") }
}
}
```
### Step 2: Add the Dependencies
Include the Monita SDK and the Monita Adapter Library in your **module-level** `build.gradle.kts` or `build.gradle` file:
```gradle theme={null}
dependencies {
implementation ("com.github.rnadigital.monita-android-sdk:monita-android-sdk:v1.10.0")
implementation ("com.github.rnadigital.monita-android-sdk:monita-adapter-library:v1.10.0")
byteBuddy ("com.github.rnadigital.monita-android-sdk:monita-adapter-library:v1.10.0")
}
```
### Step 3: Byte Buddy Plugin Integration
Add the Byte Buddy Gradle plugin to your project by including the following in your `build.gradle.kts` or `build.gradle` file:
```gradle theme={null}
plugins {
id("net.bytebuddy.byte-buddy-gradle-plugin") version "1.15.5"
}
```
### Step 4: Sync the Project
Once you've added the dependencies, sync your project with Gradle by clicking **"Sync Now"** in Android Studio or running:
```bash theme={null}
./gradlew build
```
## Usage
After successful integration, you can initialize Monita SDK in your application class:
```kotlin theme={null}
import android.app.Application
import com.rnadigital.monita_android_sdk.MonitaSDK
class MyApplication : Application() {
val token = "fe041147-0600-48ad-a04e-d3265becc4eb"
override fun onCreate() {
super.onCreate()
MonitaSDK.Builder(this)
.enableLogger(true)
.setToken(token)
.setBatchSize(10)
.setCustomerId("123456")
.setConsentString("Granted")
.setSessionId("123456")
.setAppVersion("1.0")
.build {
// Callback when initialization is complete
}
}
}
```