> ## Documentation Index
> Fetch the complete documentation index at: https://docs.getmonita.io/llms.txt
> Use this file to discover all available pages before exploring further.
# Update GTM Tag Monitoring
> This is a step by step guide to update Monita Tag Monitoring for GTM Container Monitoring
### Instructions
1. Make sure you have integrated Monita with the GTM container you would like to Monitor. See this article Integrating with a GTM container **\[TODO: ADD LINK]**
2. Hover over the container you would like to update tag monitoring for and press 'Manage'
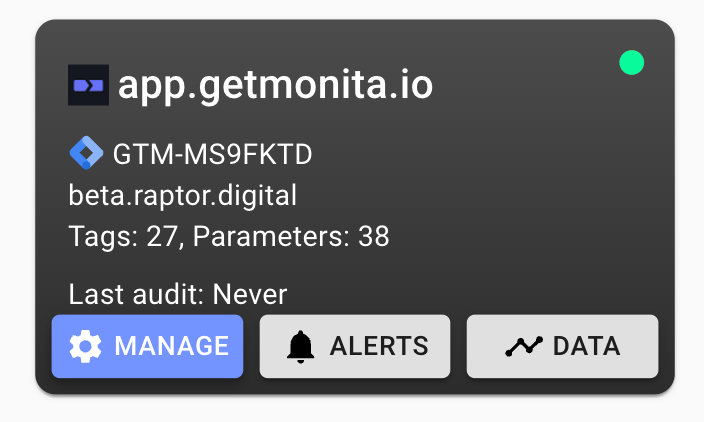 3. Use the checkboxes to fine tune how you would like to monitor the tag
1. To monitor **only the volume of a tag** - select only the top level checkbox only
2. To monitor **a specific tag data/variable** - select the checkbox next to the specific tag variable
3. Use the checkboxes to fine tune how you would like to monitor the tag
1. To monitor **only the volume of a tag** - select only the top level checkbox only
2. To monitor **a specific tag data/variable** - select the checkbox next to the specific tag variable
 4. Press 'Save'
This update the associated Monitoring Tag within Google Tag Manager
4. Press 'Save'
This update the associated Monitoring Tag within Google Tag Manager
 By default Monita will create a workspace called "Monita Deployment Workspace" and push any required Monita template changes to that workpspace.
If you are using the free version GTM, make sure to have no more than 2 workspaces in use as there is a limit of 3 workspaces. In these cases Monita will push to the default workspace.
5. Upon completion a Domain Setup modal will close.
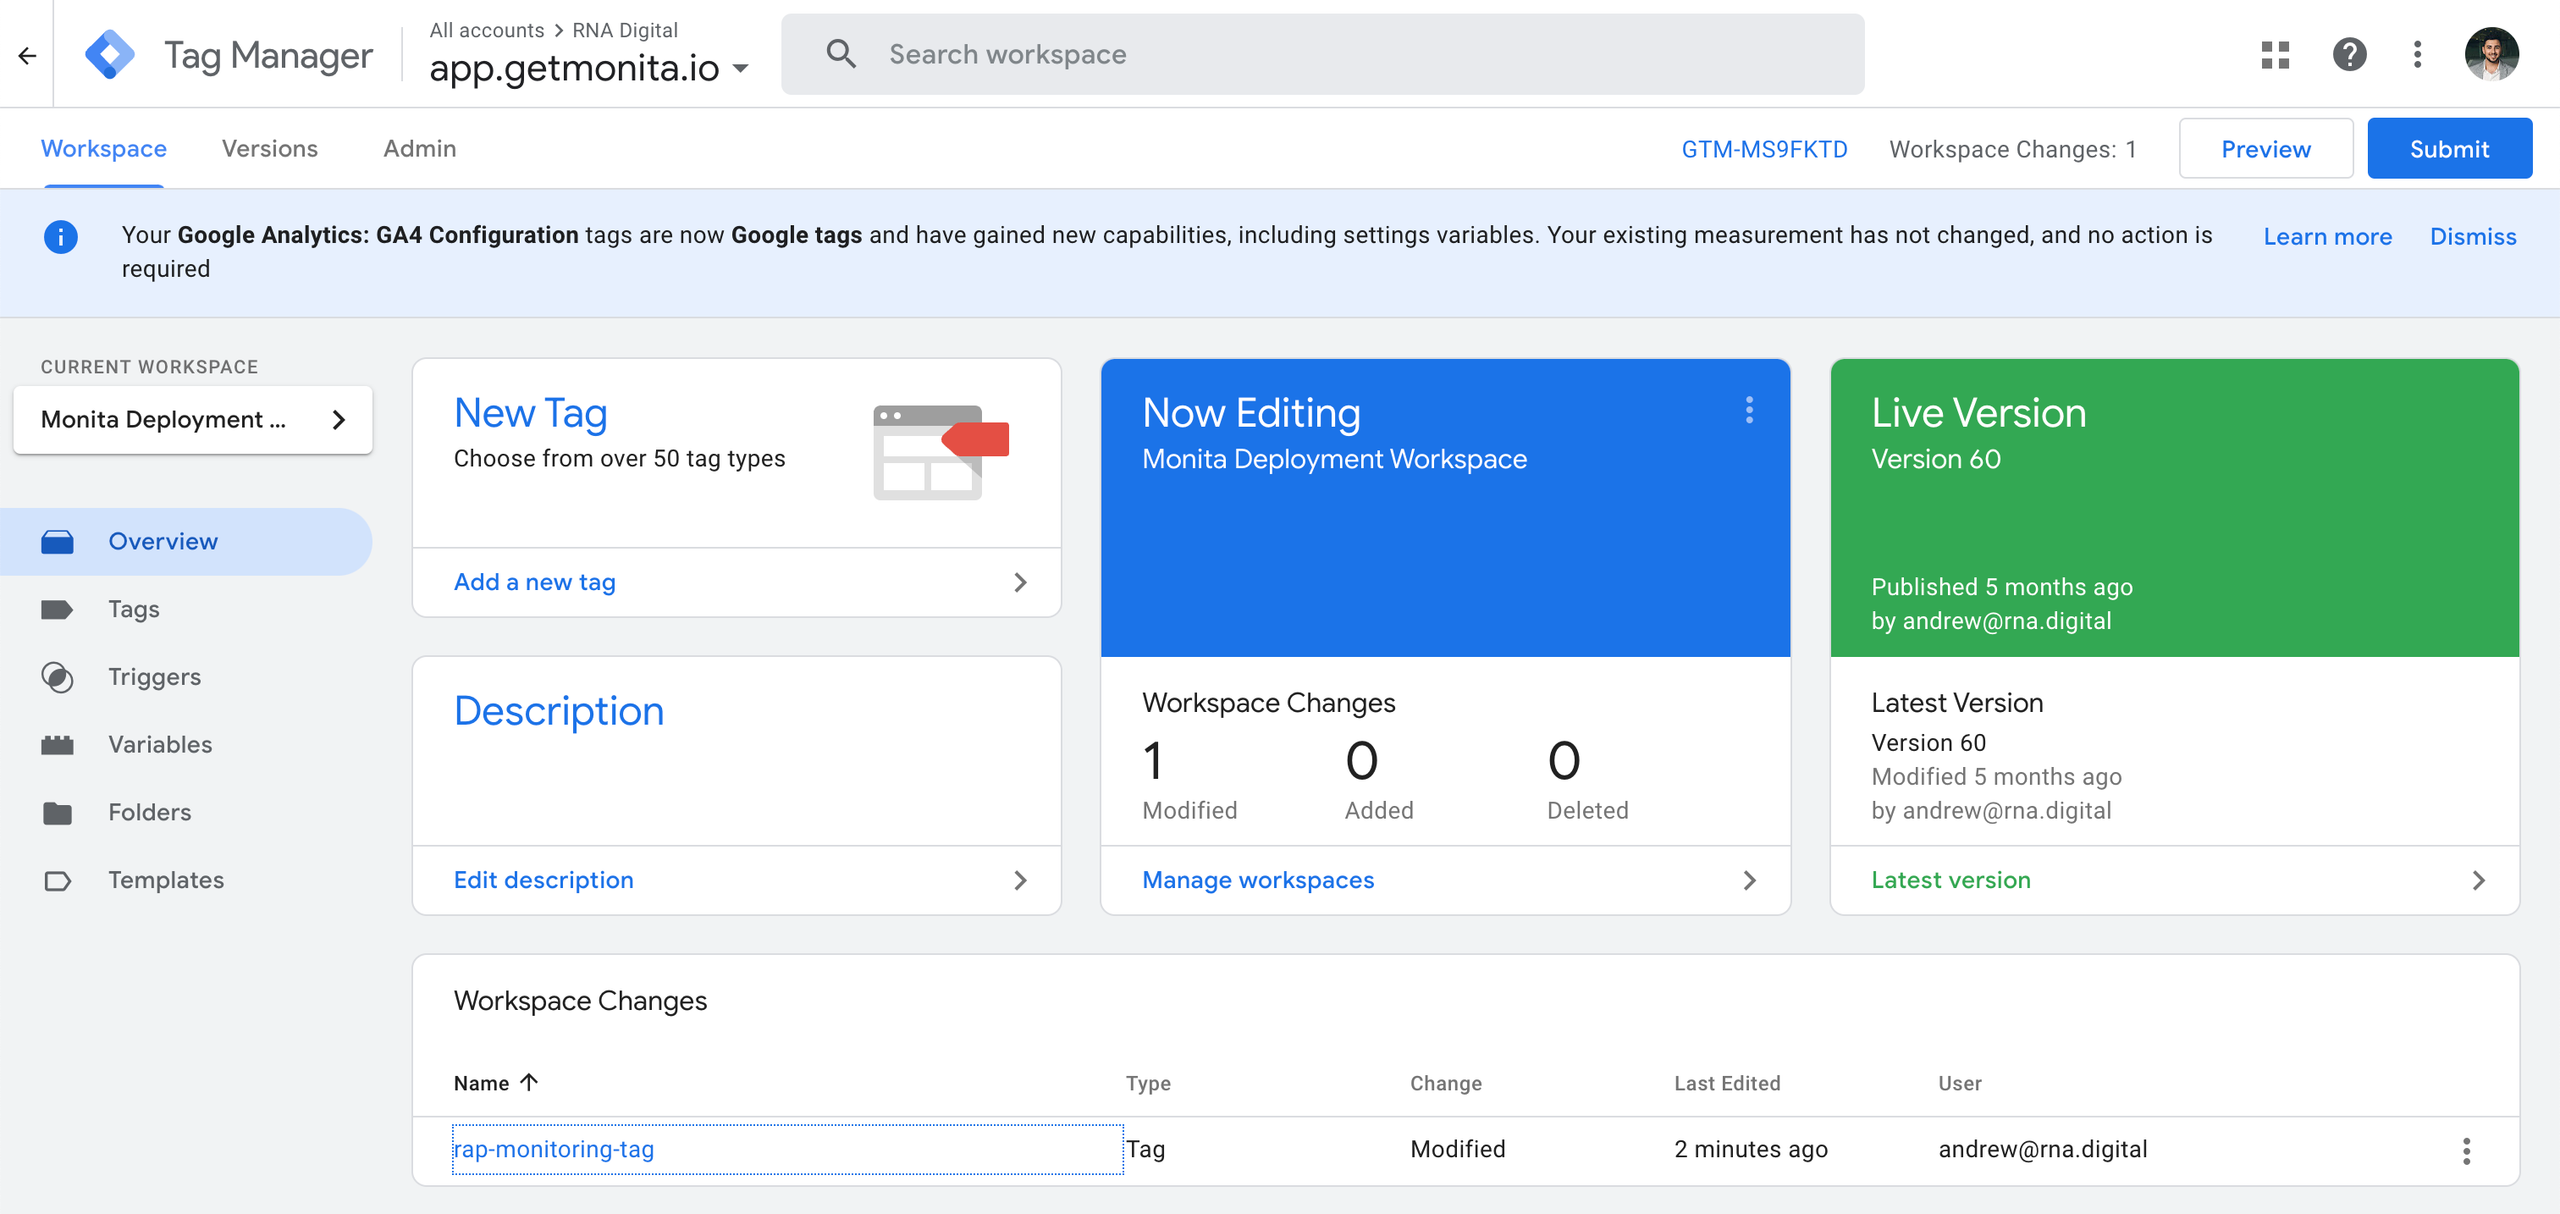
6. Enter into the target Monita Deployment Workspace and verify the changes.
By default Monita will create a workspace called "Monita Deployment Workspace" and push any required Monita template changes to that workpspace.
If you are using the free version GTM, make sure to have no more than 2 workspaces in use as there is a limit of 3 workspaces. In these cases Monita will push to the default workspace.
5. Upon completion a Domain Setup modal will close.
6. Enter into the target Monita Deployment Workspace and verify the changes.
 You will notice a modification to your Monita tag (your Monita tag name may be different)
 7. You can either Preview or Submit your container to production.
If previewing tags, they will fire as usual, although traffic will not be admitted to Monita so that outliers are not introduced to your production data.
8. You can confirm your tag is firing by looking on the Client side and filtering network requests for raptor.digital, or by entering your by filtering your Monita Dashboard for results
7. You can either Preview or Submit your container to production.
If previewing tags, they will fire as usual, although traffic will not be admitted to Monita so that outliers are not introduced to your production data.
8. You can confirm your tag is firing by looking on the Client side and filtering network requests for raptor.digital, or by entering your by filtering your Monita Dashboard for results
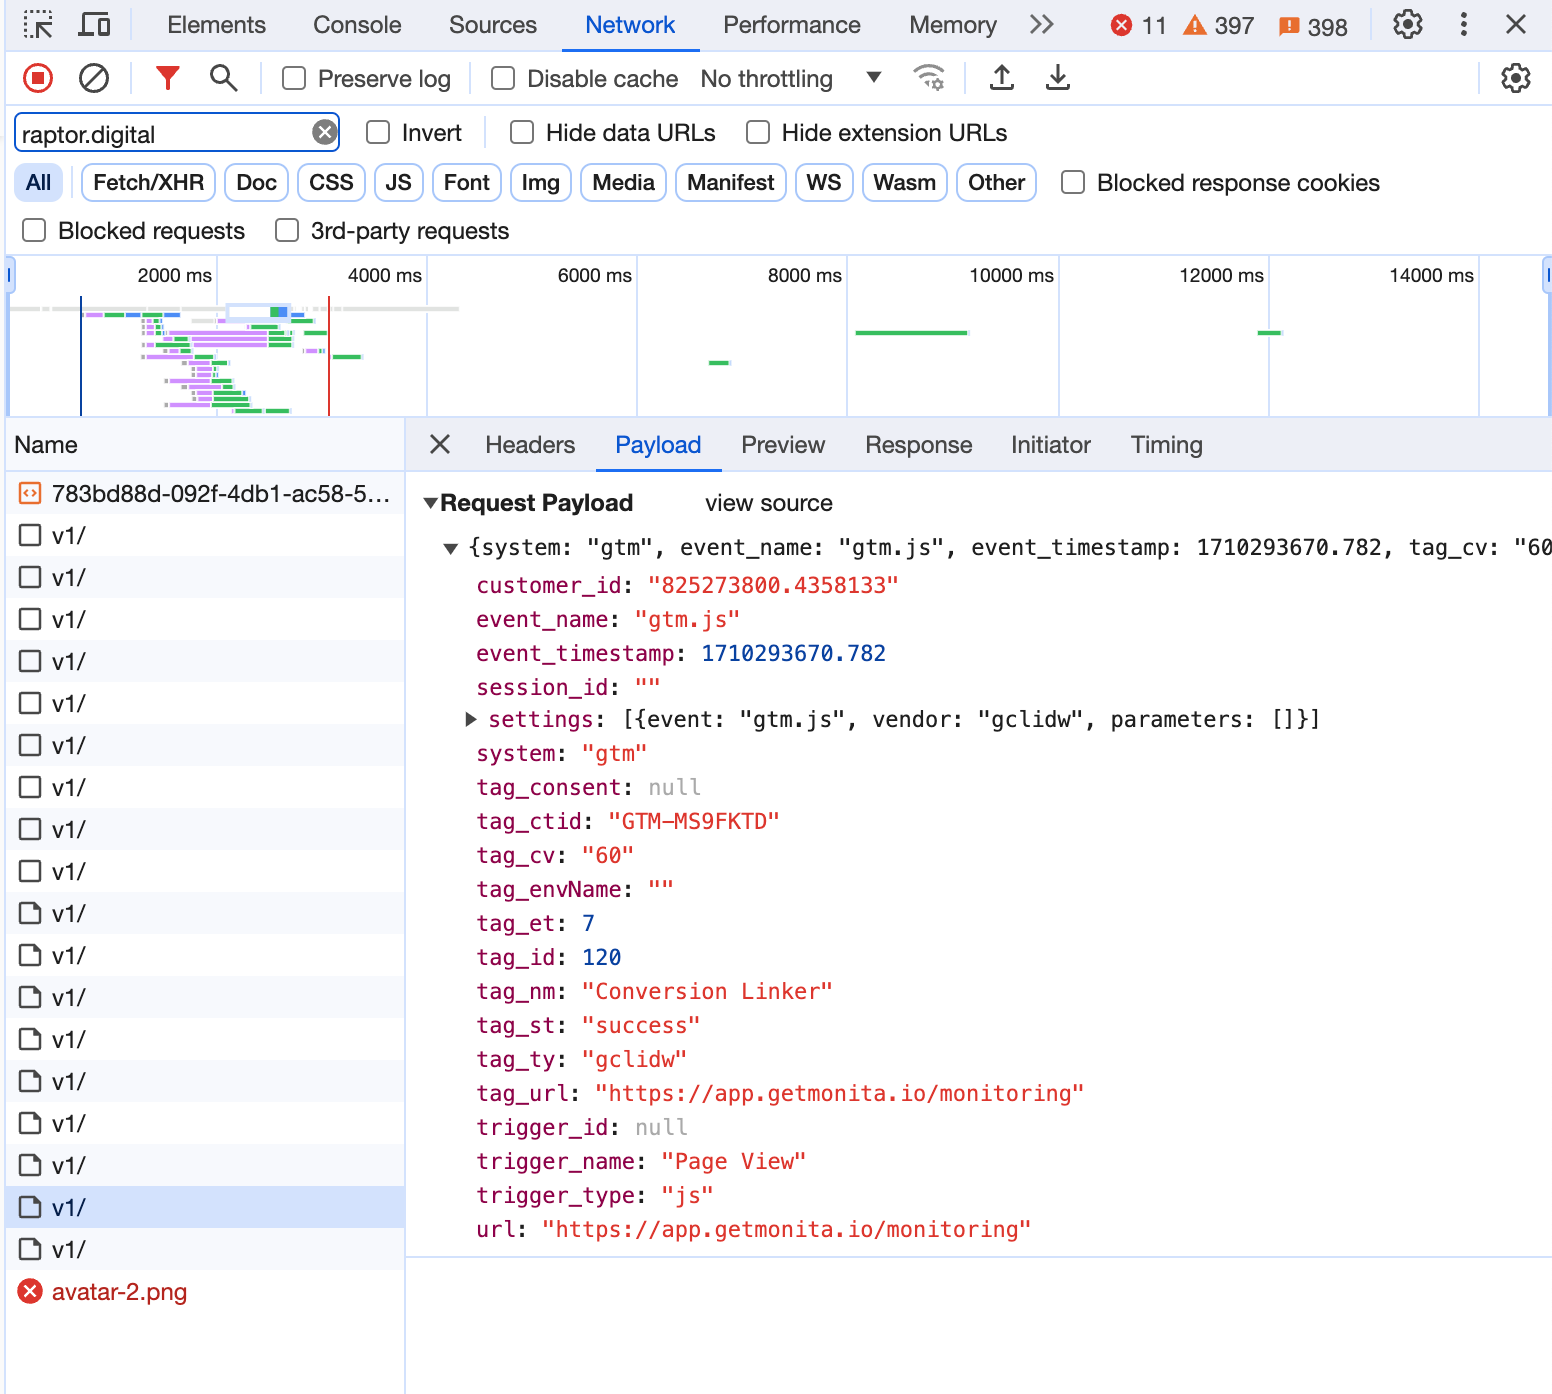 Checking in the platform