- Marketing/conversion events to platforms like google ads or facebook
- Data layer events
- Analytics or CDP events to platforms like GA4, Adobe Analytics or Tealium/Segment CDP
- Any outgoing HTTP event (so long as you know the URL header)
Instructions
- Click ‘New Domain’ and your domain and select the Monitoring Tab
- Provide the System you wish to Monitor events from.
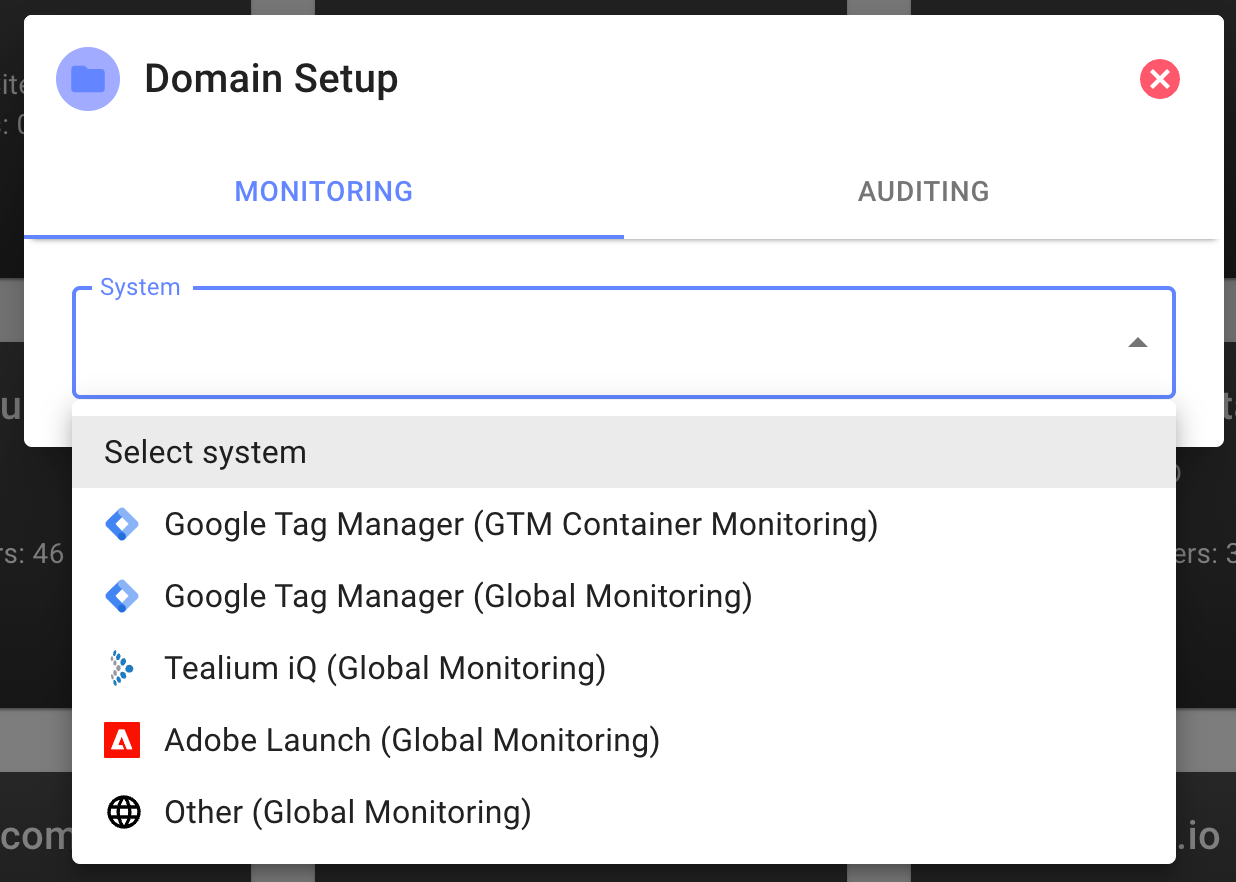
Note the base Javascript for all Global Monitoring is quite similar, the various tag manager flavours differ in the specific metadata they automatically pick up from the browser.
google_tag_manager and take the container name and version.
utag and take the profile name and version.
_satellite and access the launch property and version.
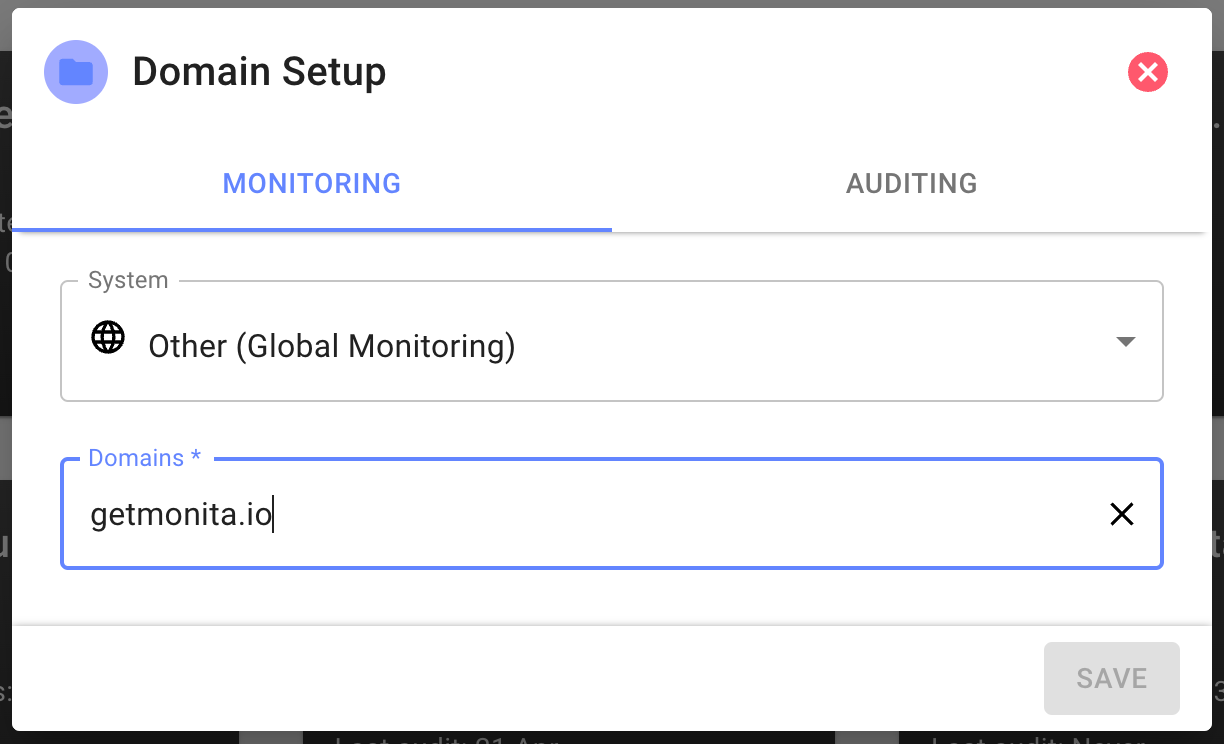
tC and access account, container and environment.Other is an Agnostic Browser JS SDK and can be run on any browser or any system not specifically mentioned (e.g Segment, Ensighten etc).- Next provide the Domain you wish to ingest events from and press enter (you can add subdomains here)
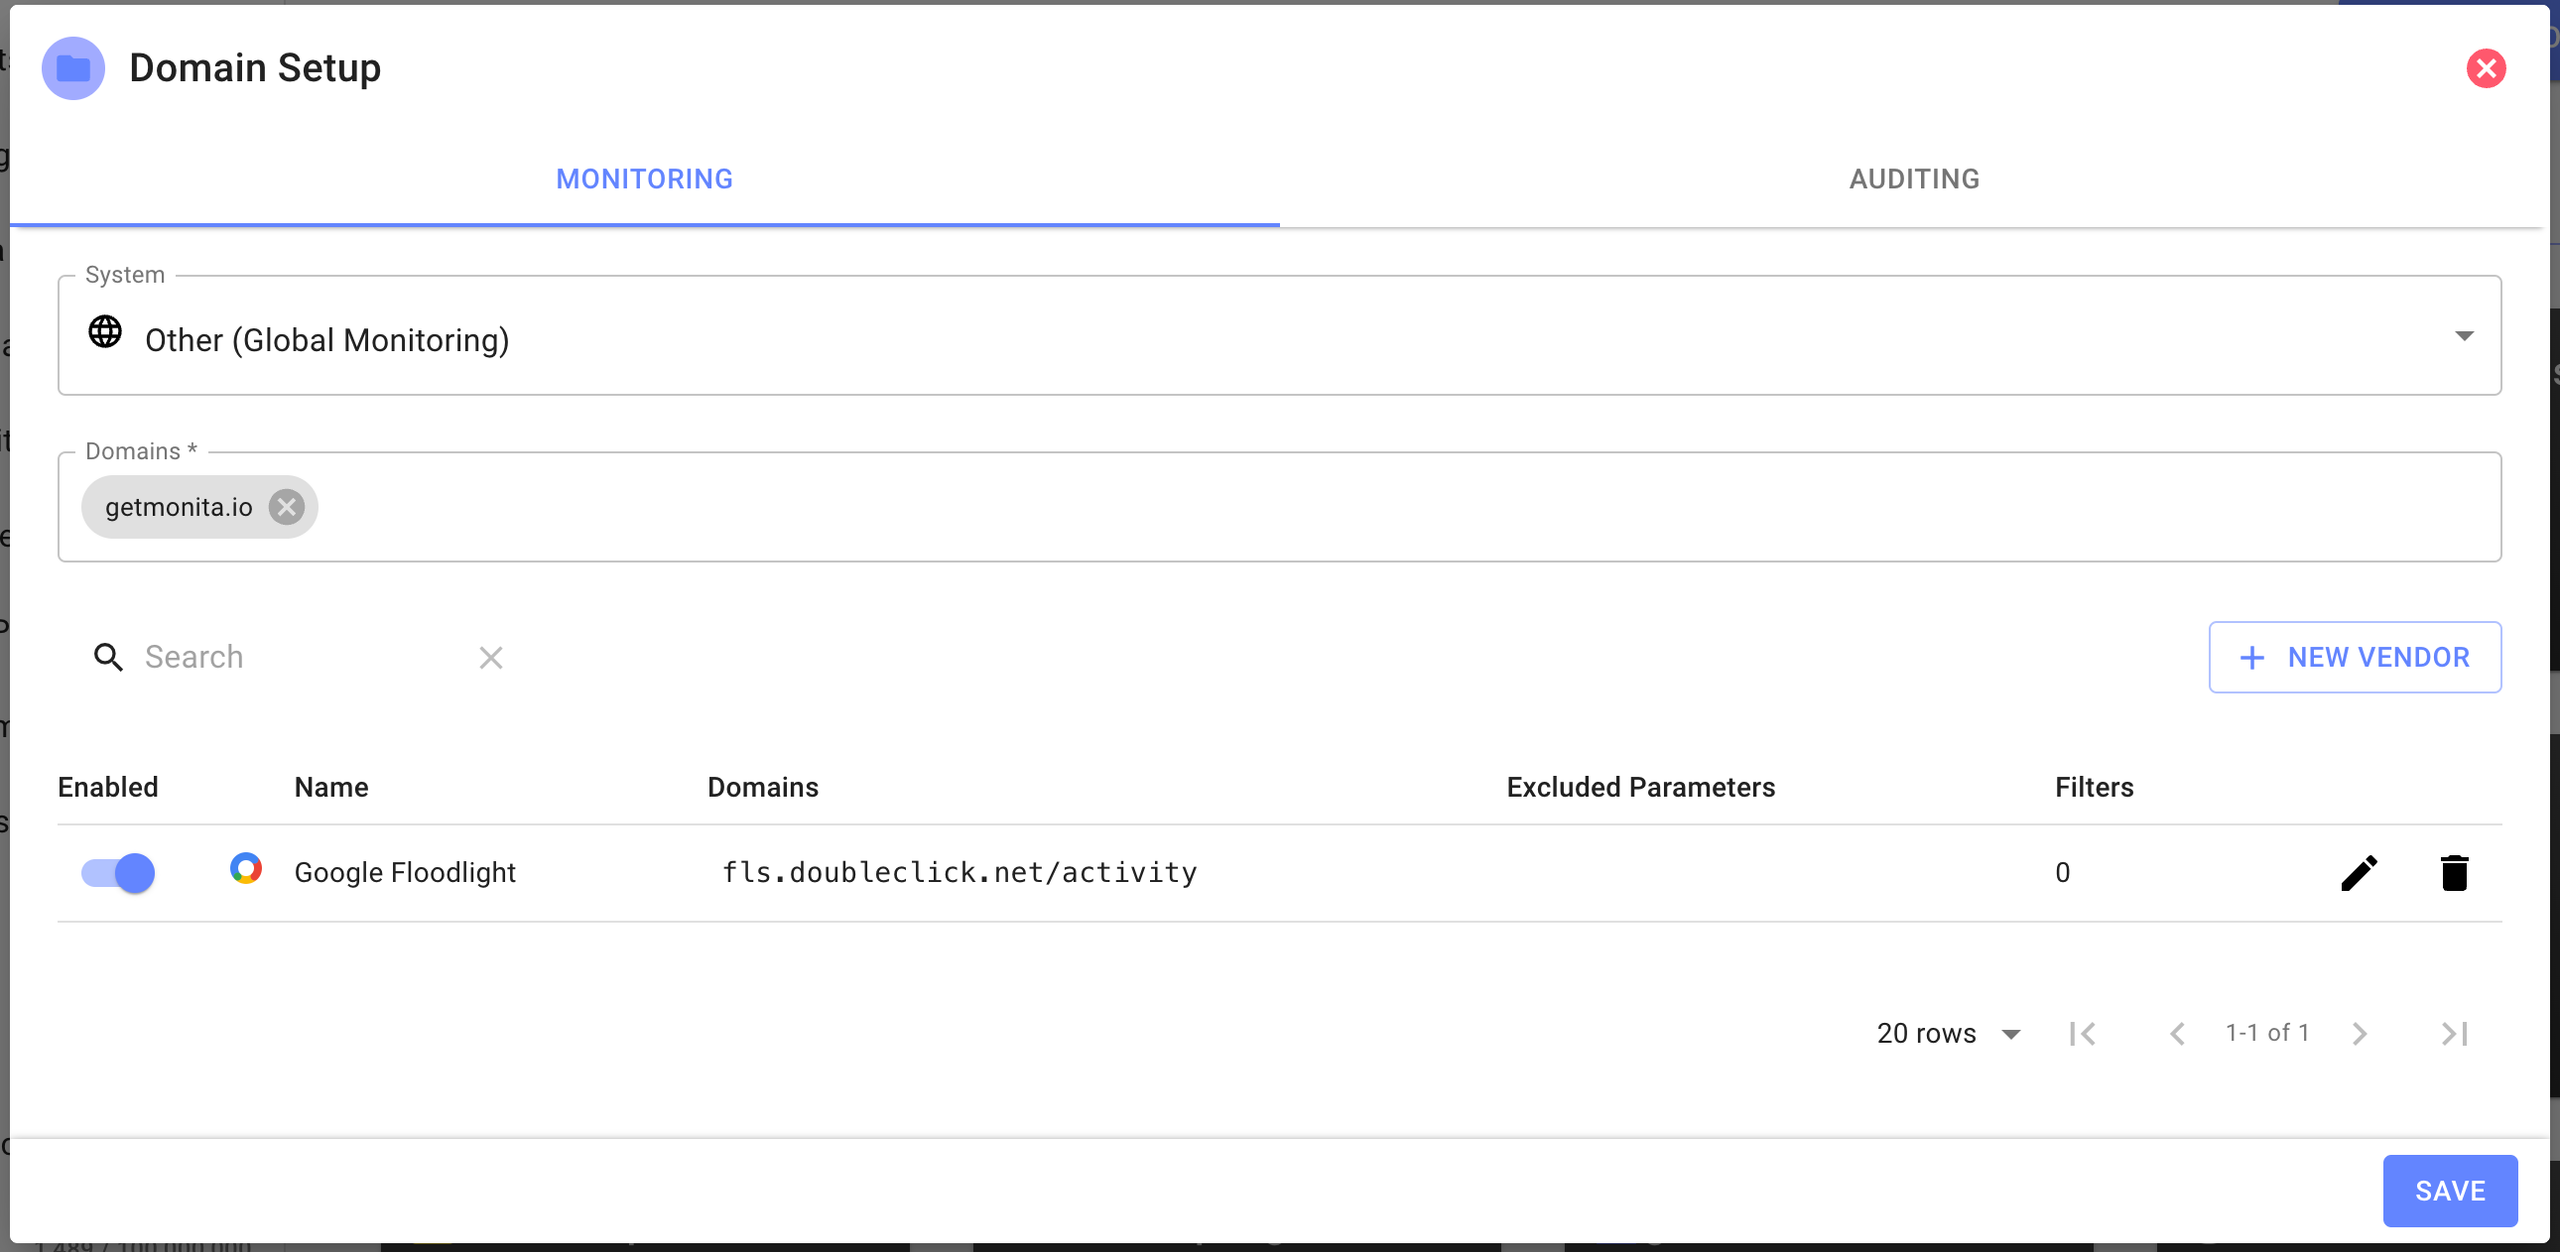
- Start adding Vendors by Clicking new Vendor
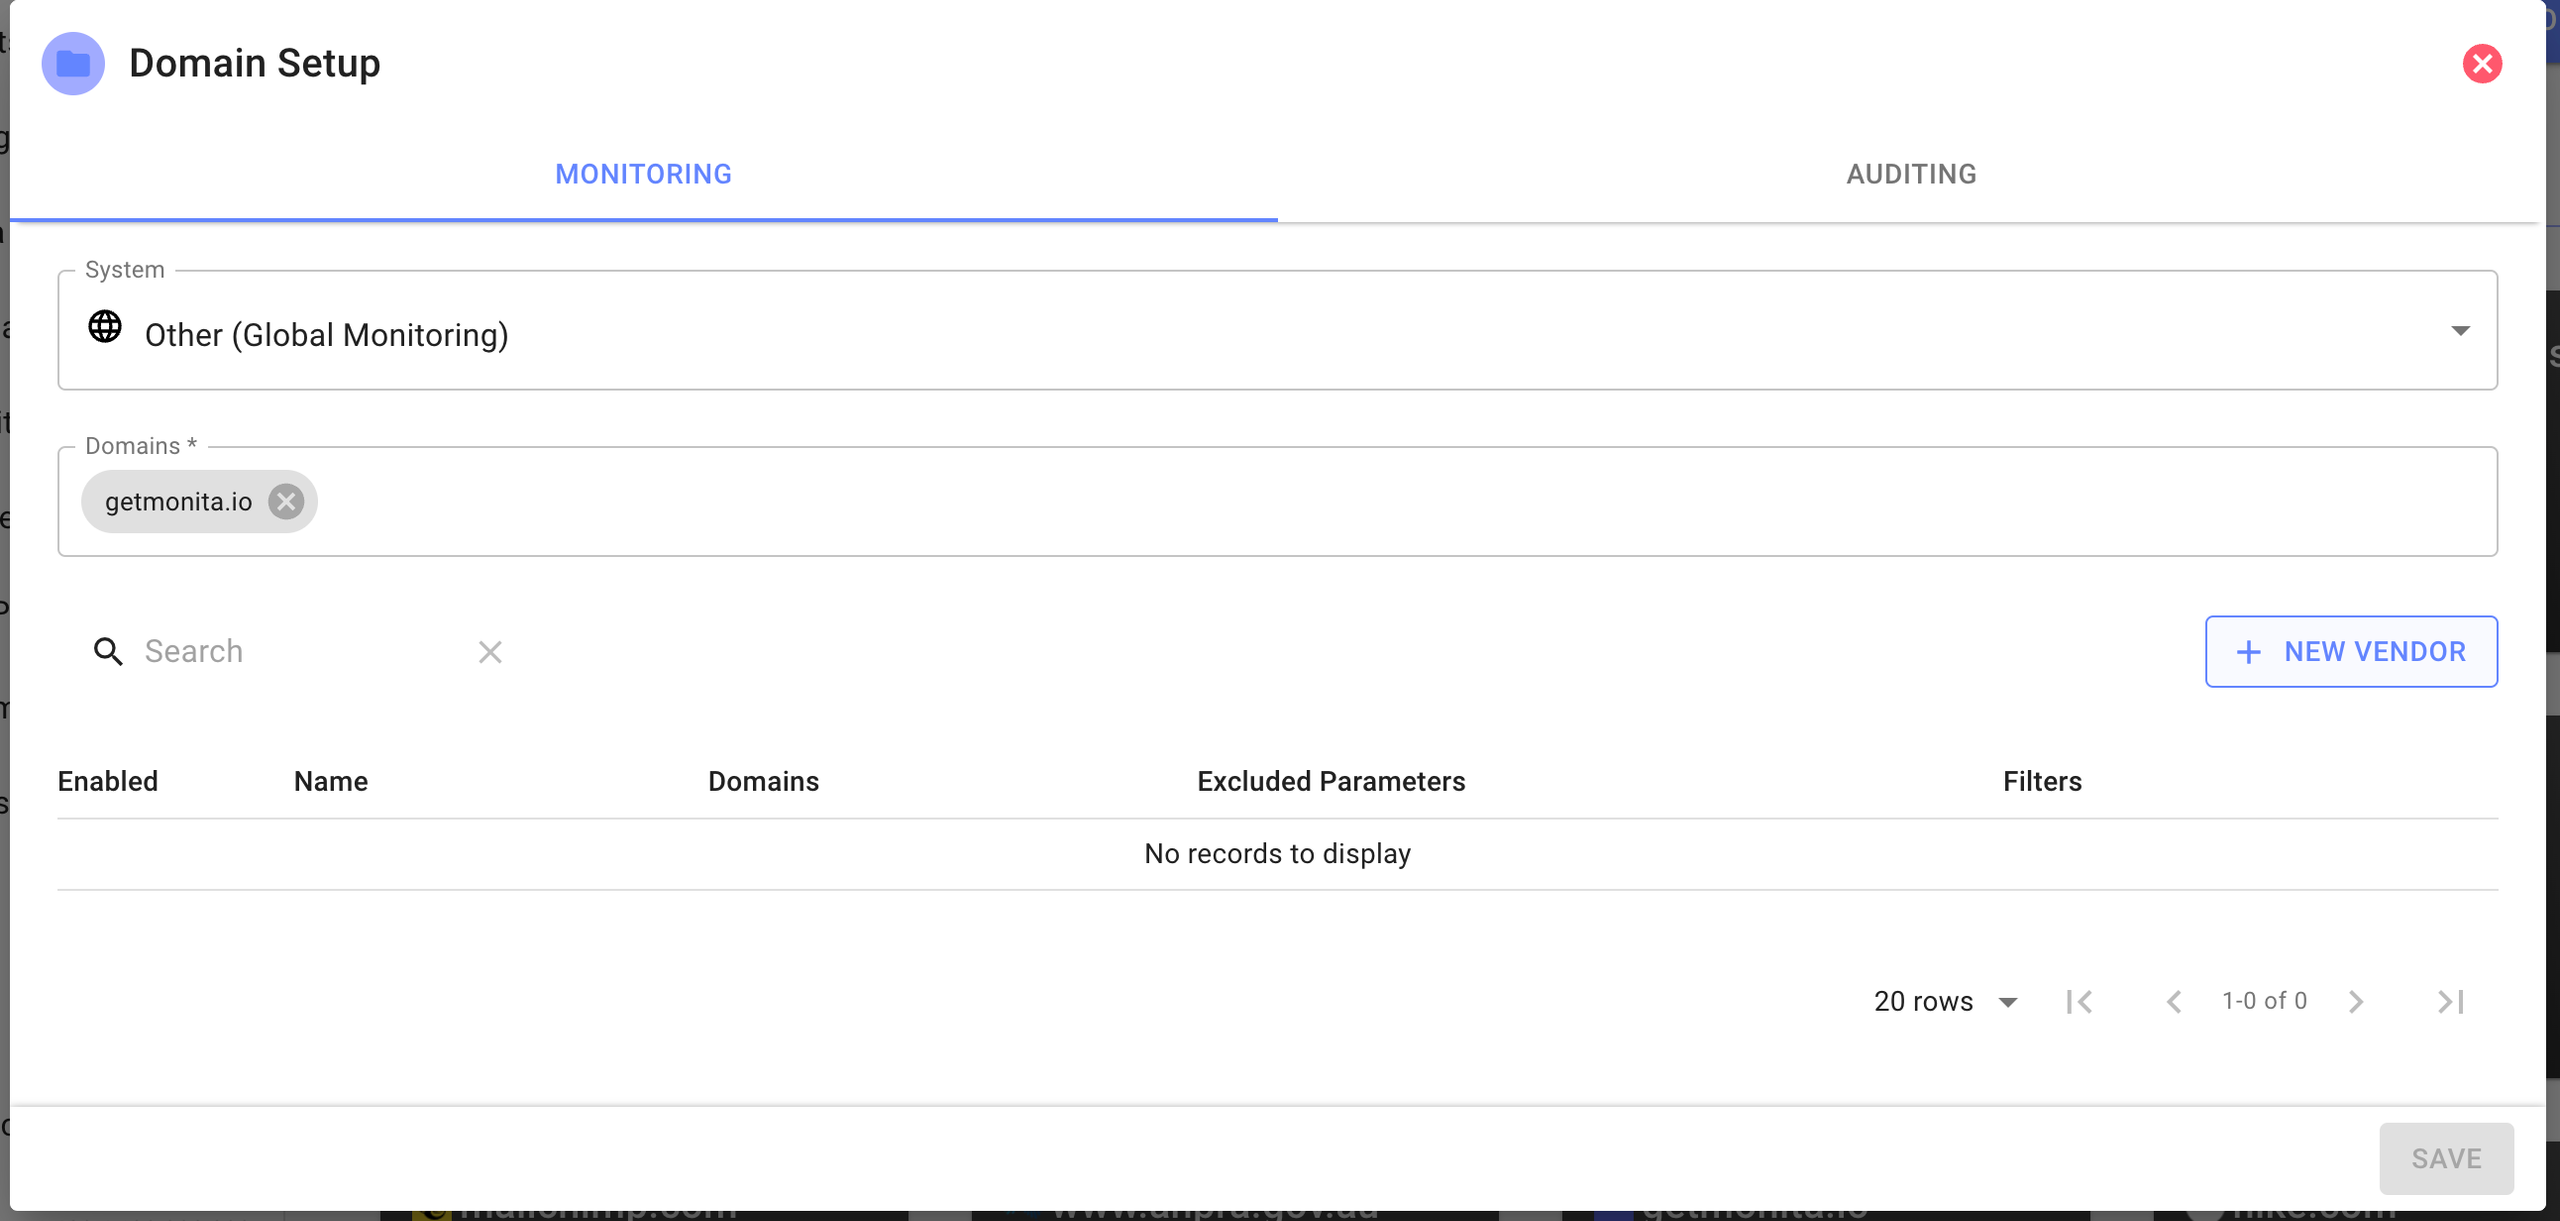
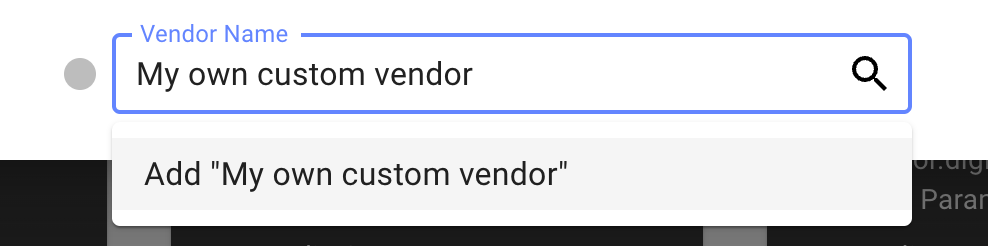
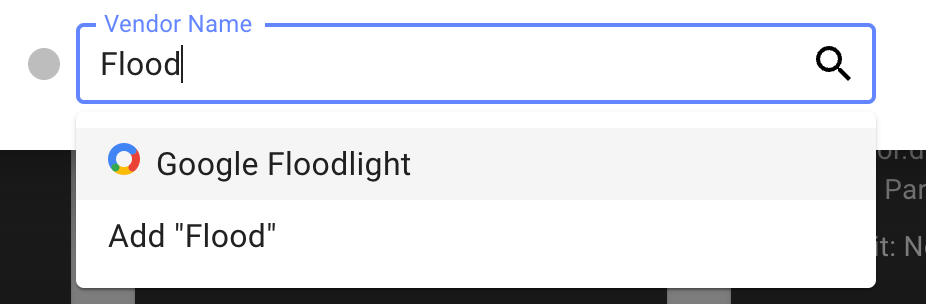
- Search for an existing Vendor or create a Custom Vendor
- Fill in the Monitoring Form for the specific Vendor you have Chosen
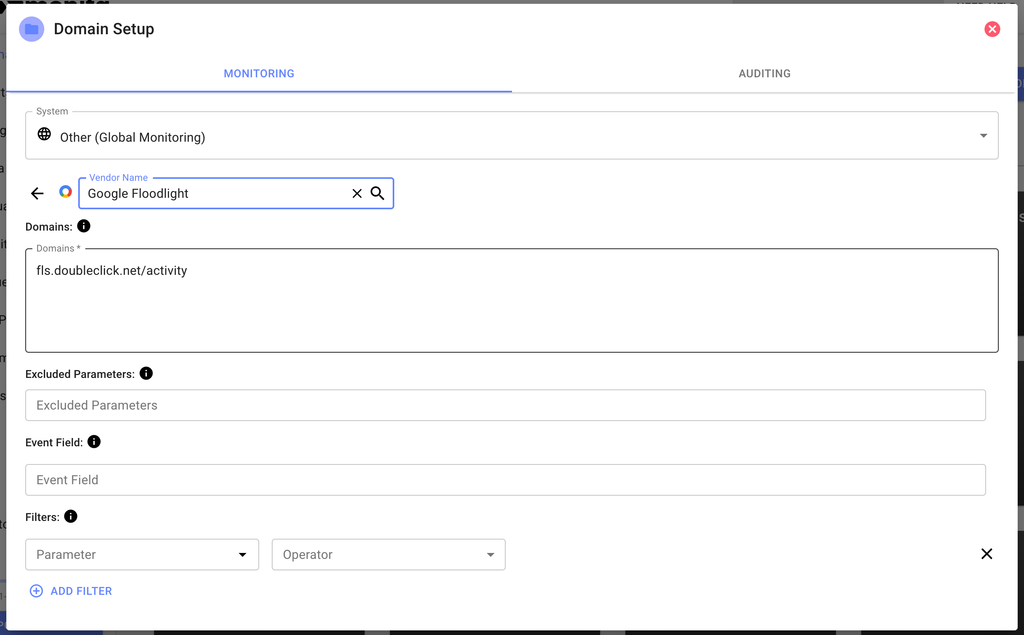
Domains
Domains
This is the domain which client side pixel/tag requests are sent to.
Typically known as the request URL e.g. for Facebook, “facebook.com/tr”.
Excluded Parameters
Excluded Parameters
Use this field to specify which keys you would like to exclude from monitoring. e.g. Facebook sends an “sw” parameter with screen width. If you don’t want/need to monitor that key, enter it here. This field also accepts regex. Regex should be encapsulated within forward slashes
/. As an example if you entered /^(data\.loader|data\.timing)\./ this would ensure that anything starting with data.loader. and data.timing. would not be monitored.Event Mapping Field
Event Mapping Field
Used to specify which key in the vendors payload corresponds to the event name.
You can specify either a single field by name, or multiple fields inside curly braces e.g. 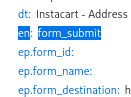
{{fieldA}}-{{fieldB}}. Here is an example request with the event in the “ev” parameter:regex::(?<=https:\/\/)[\w|-]*::urlThis format represents 3 sections, separated by double-colons (::). The 3 sections are:regexwhich inpforms the expression parser that the user is passing a regex expression(?<=https:\/\/)[\w|-]*is the regular expression itself (javascript regex supported. Test your regex in any regex editor such are Regexr)urlis the field from which the content is extracted. You may use a dot (.) separated field path. (url,host,methodandvendorNameare automatically added to the payload)
eve-{{regex::(?<=https:\/\/)[\w|-]*::url}} (multiple digits) on value of field “myfield”. In a payload { url: "https://subdomain.myapp.com" }, the event field will be eve-subdomain.Filters
Filters
Use this to focus your monitoring to specific vendor requests e.g. only where “ev” = “orderSuccess”. This can also help reduce API call consumption.
- After completing your Vendor Form press the Apply and then the Save button. To Manage simply enter this form again, edit and you will notice the Deployment Version at the bottom increment by 1.
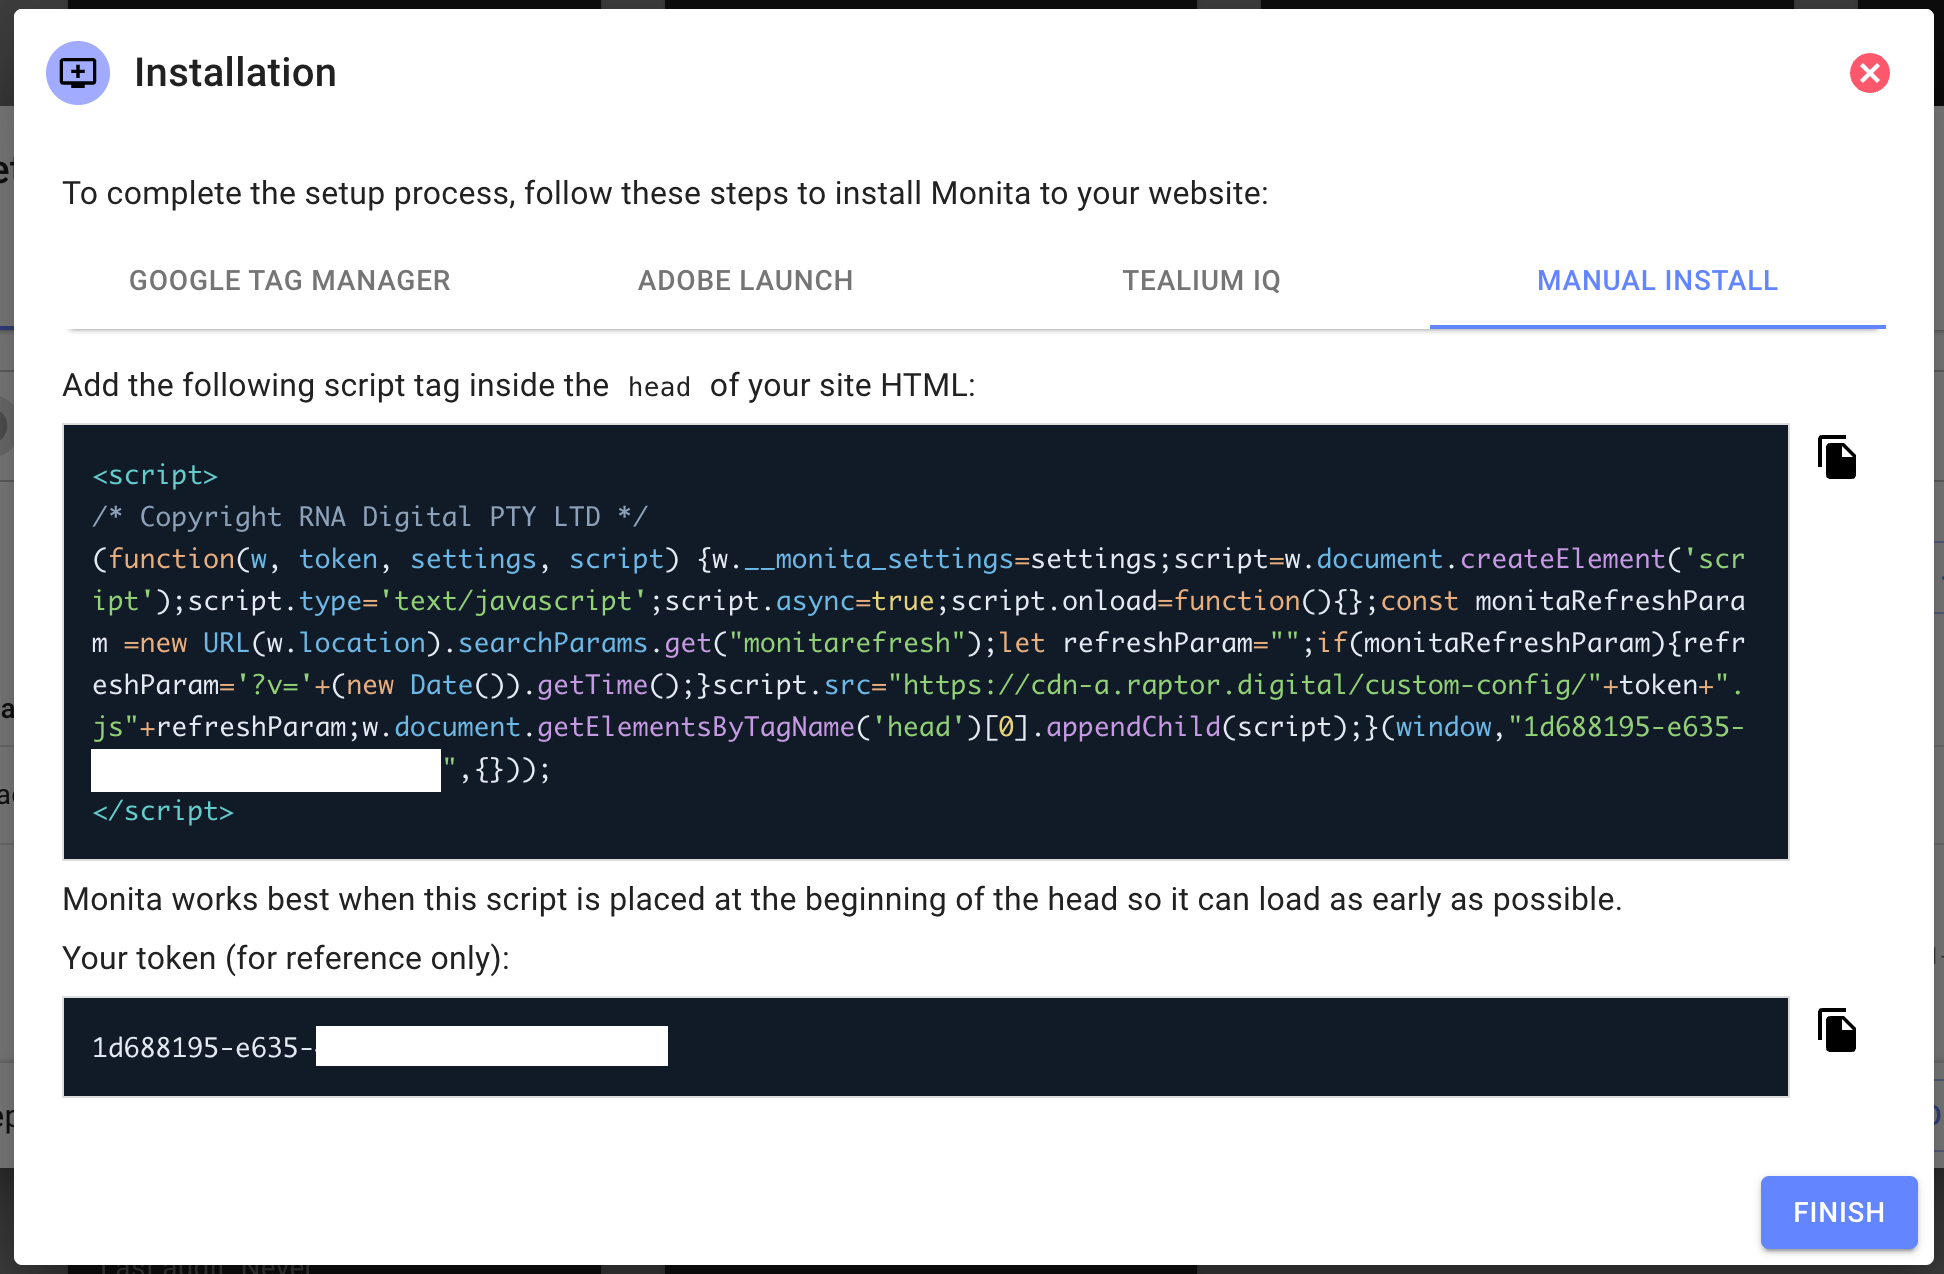
- Follow your installation guide which will provide you with your particular installation guide (depending on which System you selected).
- Once you have deployed your Monita Script to your Domain, test and troubleshoot to make the script is deployed, the Monita tag is firing and events are streamed to Monita.
Checking that Monita Script is being loaded on the Client side (your Domain)
Checking that Monita Script is being loaded on the Client side (your Domain)
- Visit the domain where you installed Monita on (make sure ad blockers are off)
- Open the browser console and type
__monita_settings - If that loads this means the Script is present on your page
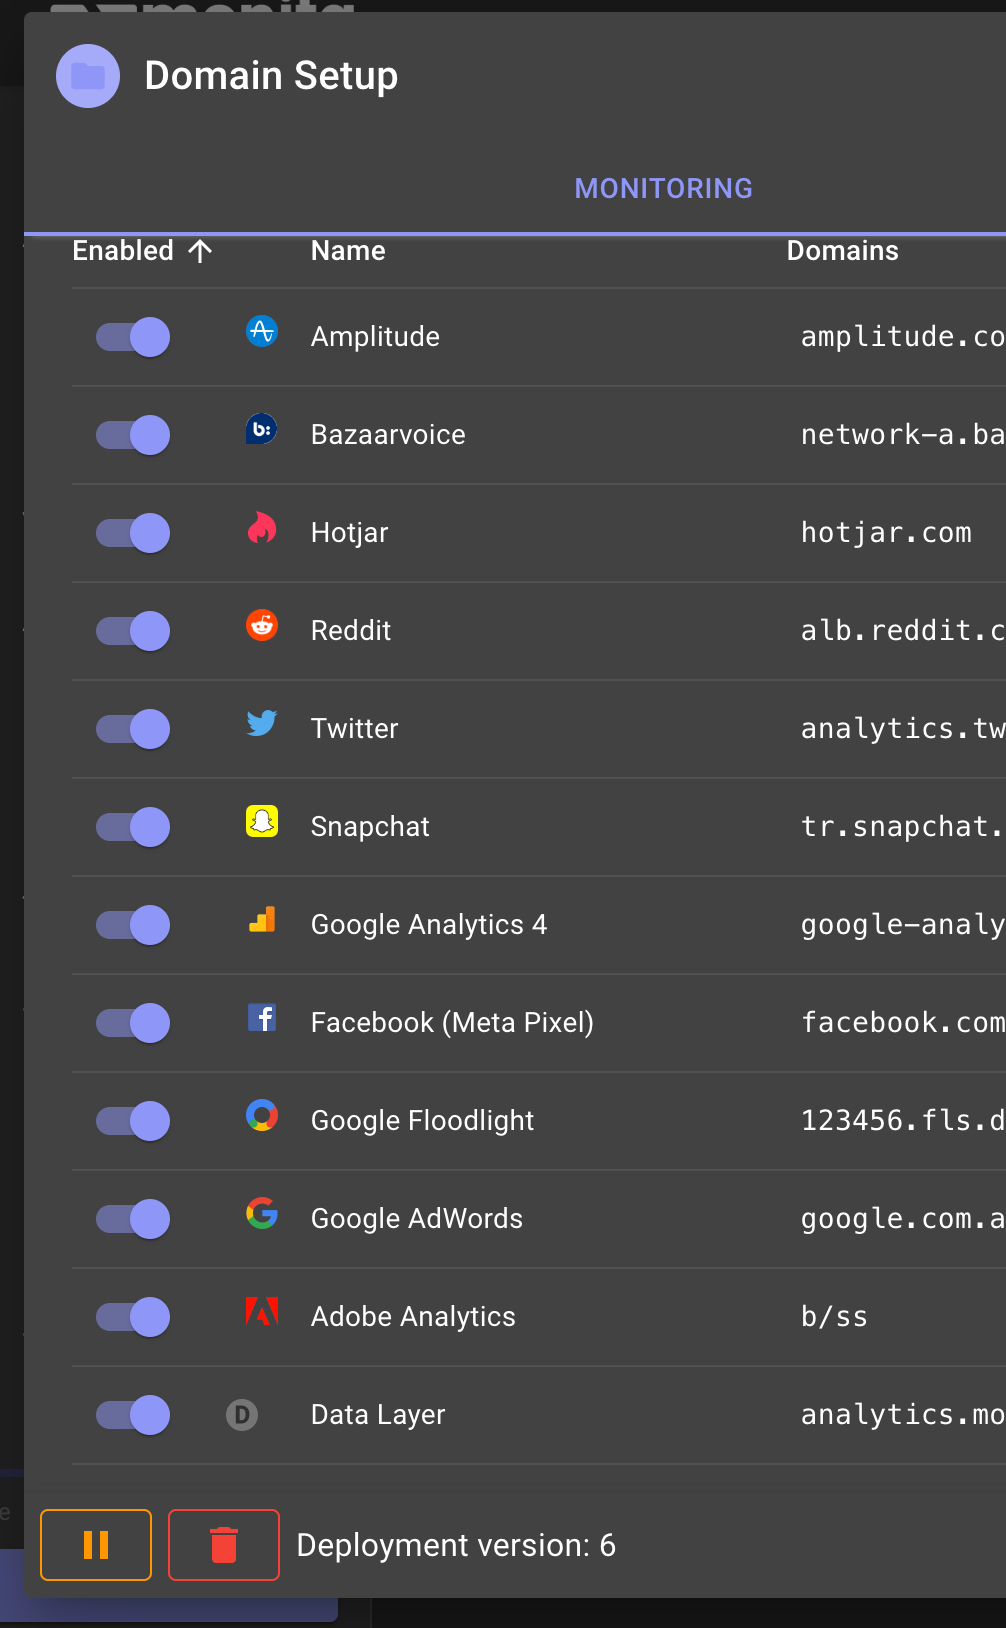
- Within the Global object you will notice the script version this should align with what you see within Domain Setup in the Deployment Version (visible next to the Bin icon)
- If you want to refresh the script on your page just add the following query string paramater to your url which and refresh the page.
?monitarefresh=1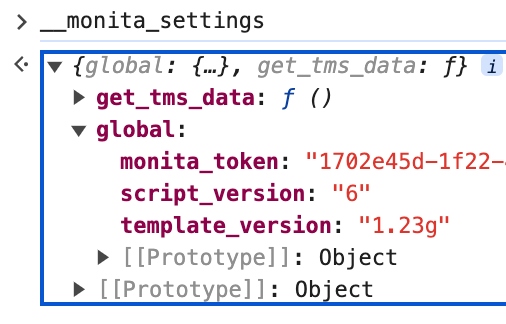
Checking Monita calls are firing on the Client side (your Domain)
Checking Monita calls are firing on the Client side (your Domain)
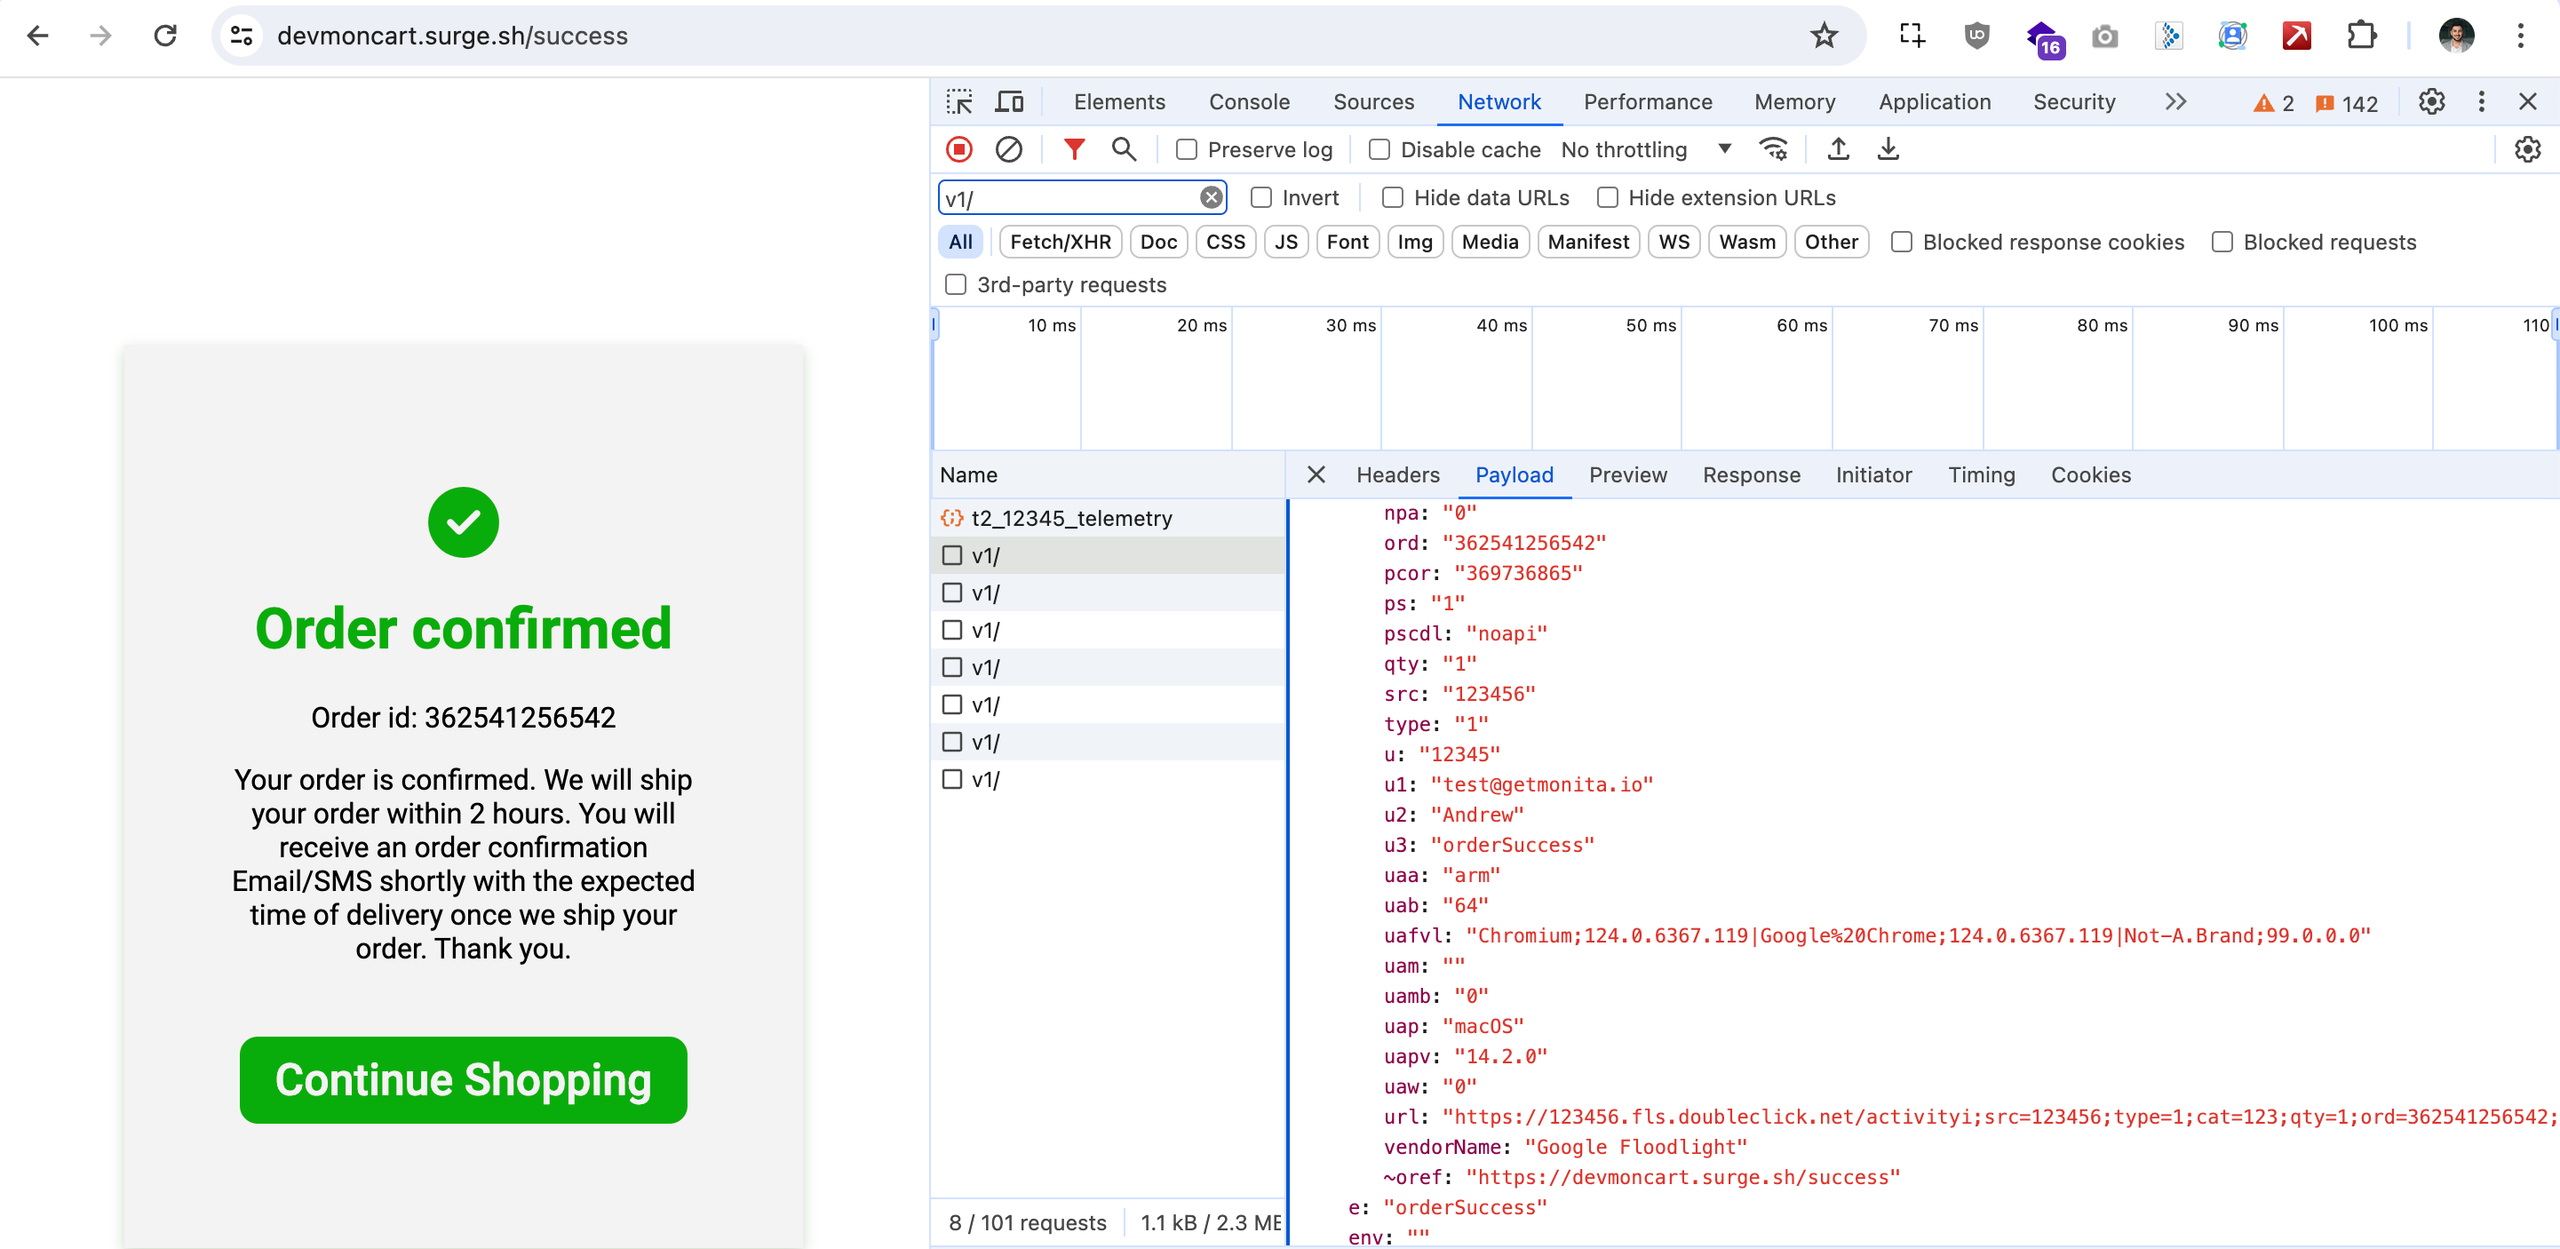
- Go to the domain you are monitoring
- Open the Developer Network Tab (F12)
- Fire off any of the Vendors/Events you have monitored in the platform
- Filter requests for v1/or raptor.digital
- Confirm you can see successful 🟢 204 requests going to our endpoint
Checking Monita calls are being received on the Server Side (Monita)
Checking Monita calls are being received on the Server Side (Monita)
Open the Visualisation Tab in Monita.You should be able to see your events grouped by Vendor and Event and filter for any of the keys that have been ingested from each vendor/event by Expanding an event and filtering on the Data Tab.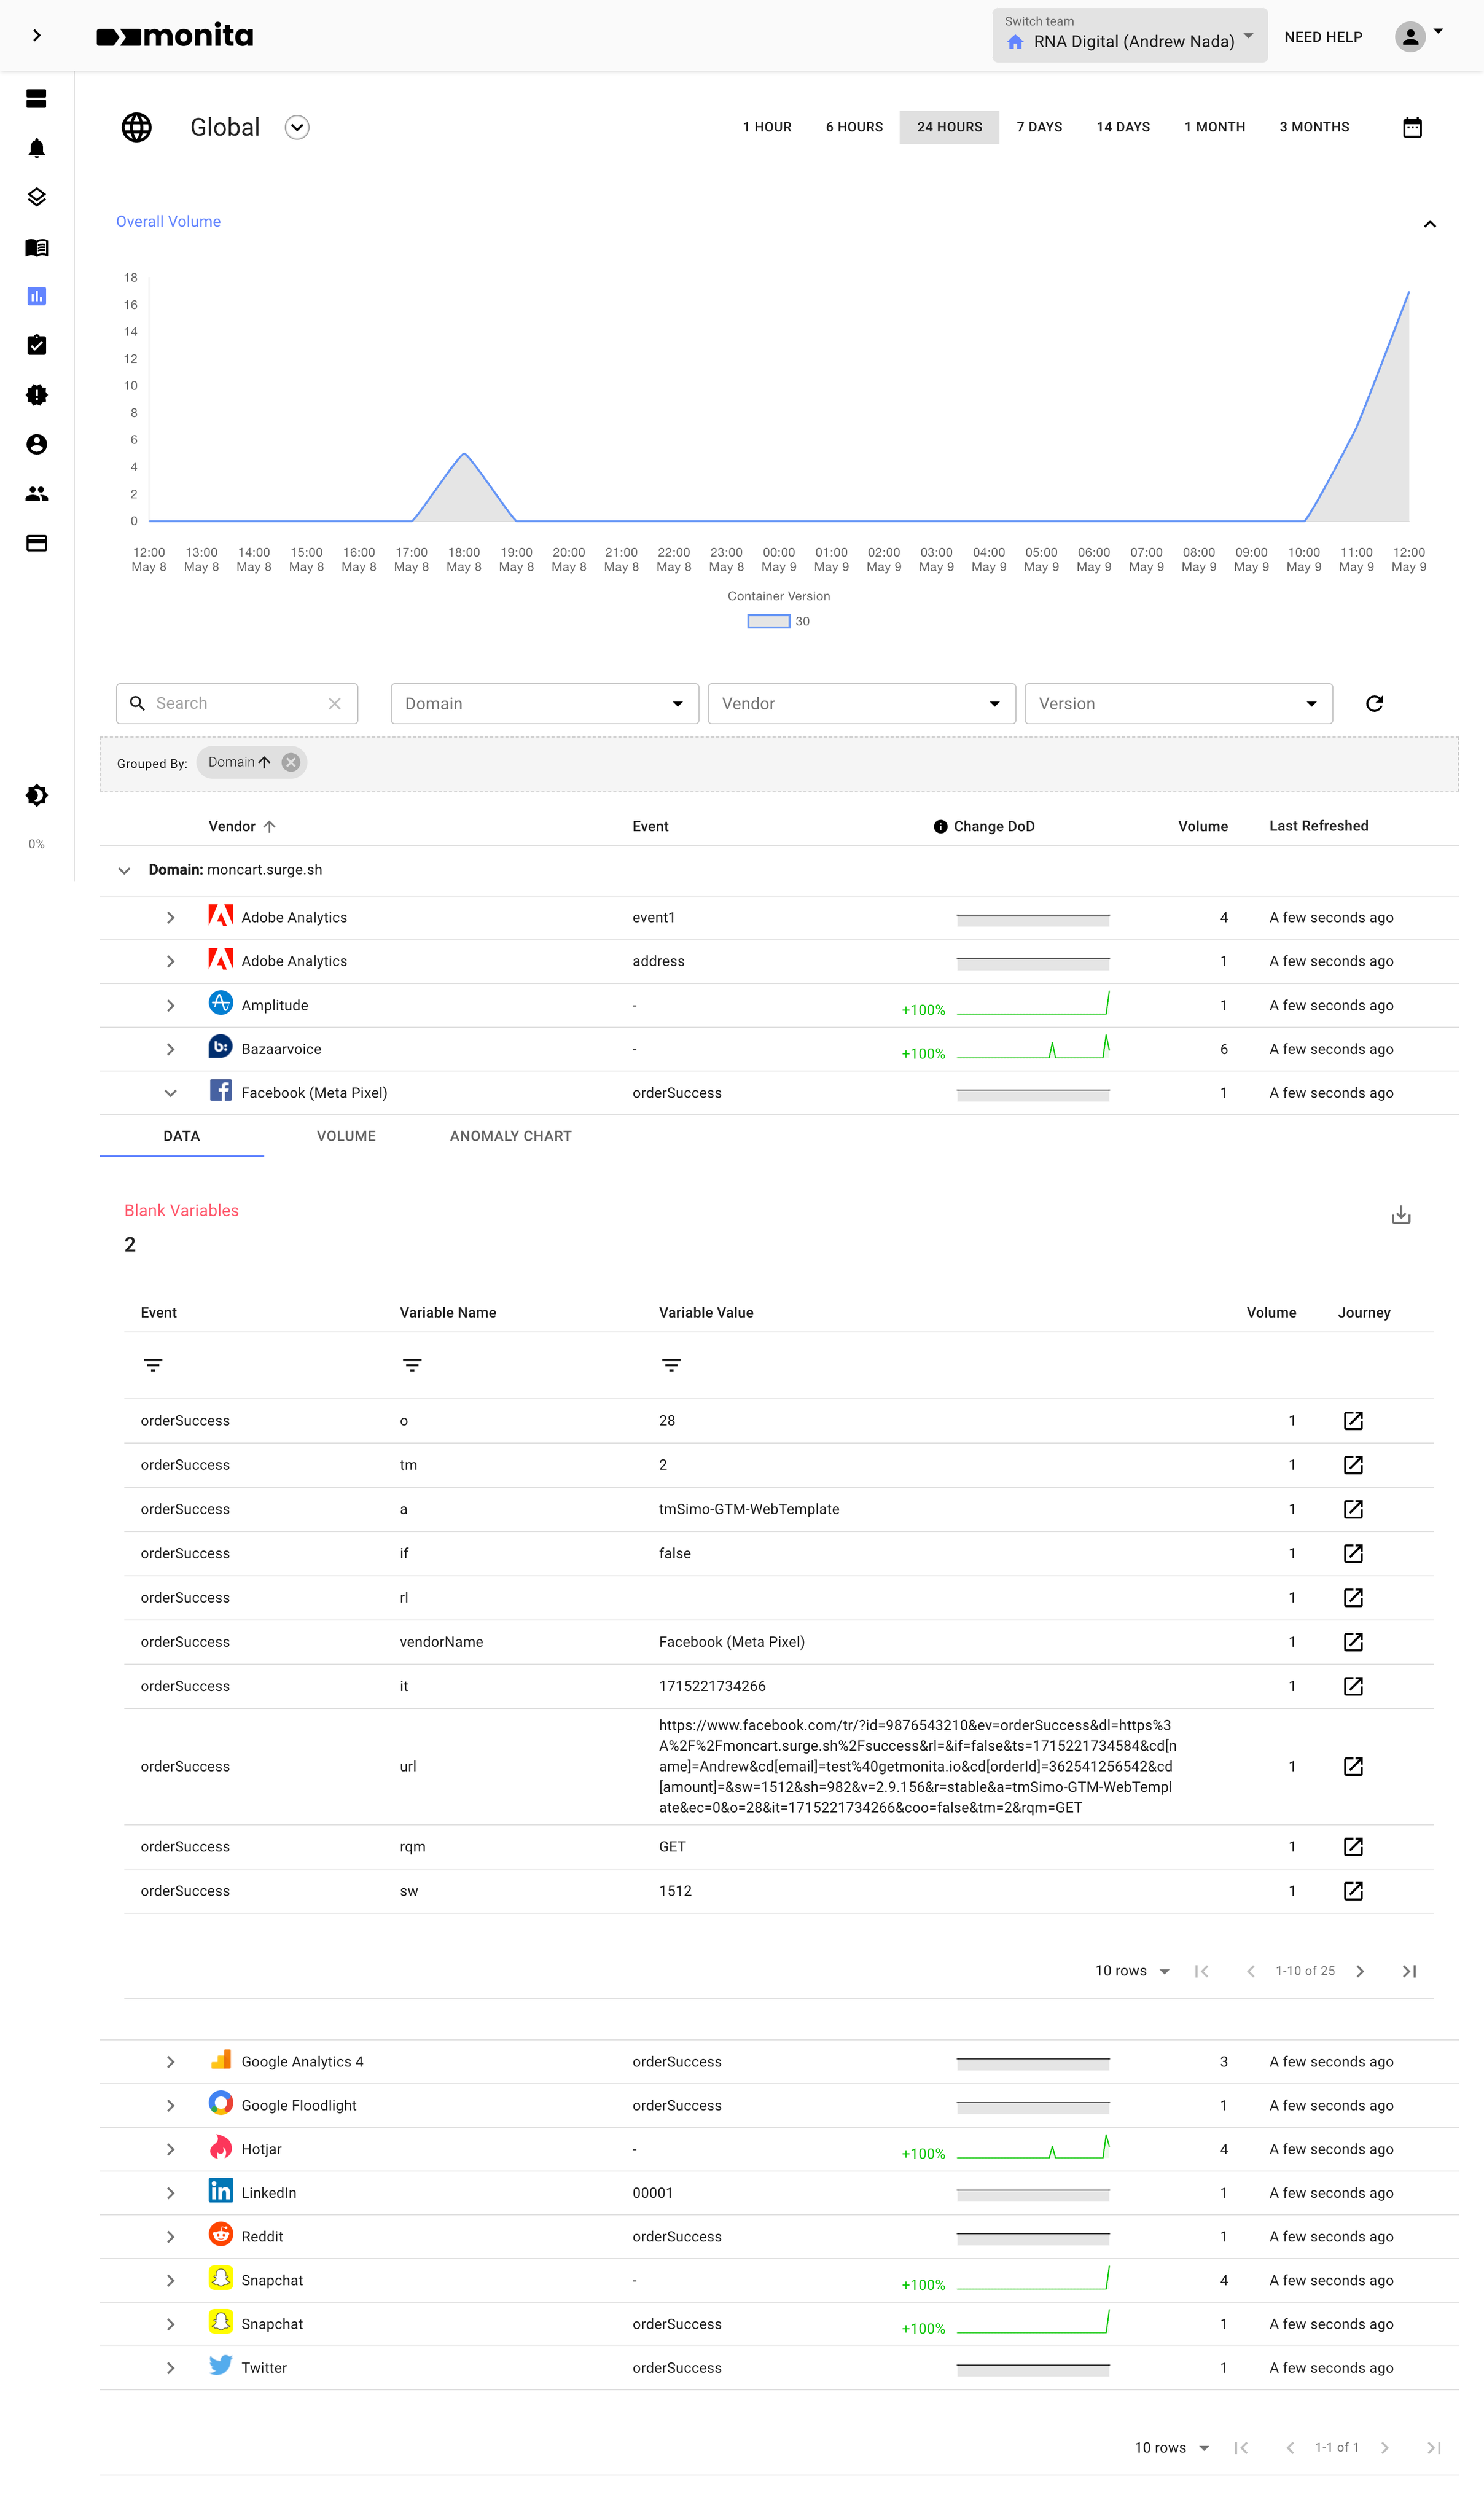
If you have not completed your Event Mapping Field, from your Vendor Setup, events will not group by event, they will be instead only be grouped by a Vendor with the event being blank. You will know event is mapped properly if it appears on the client side in the 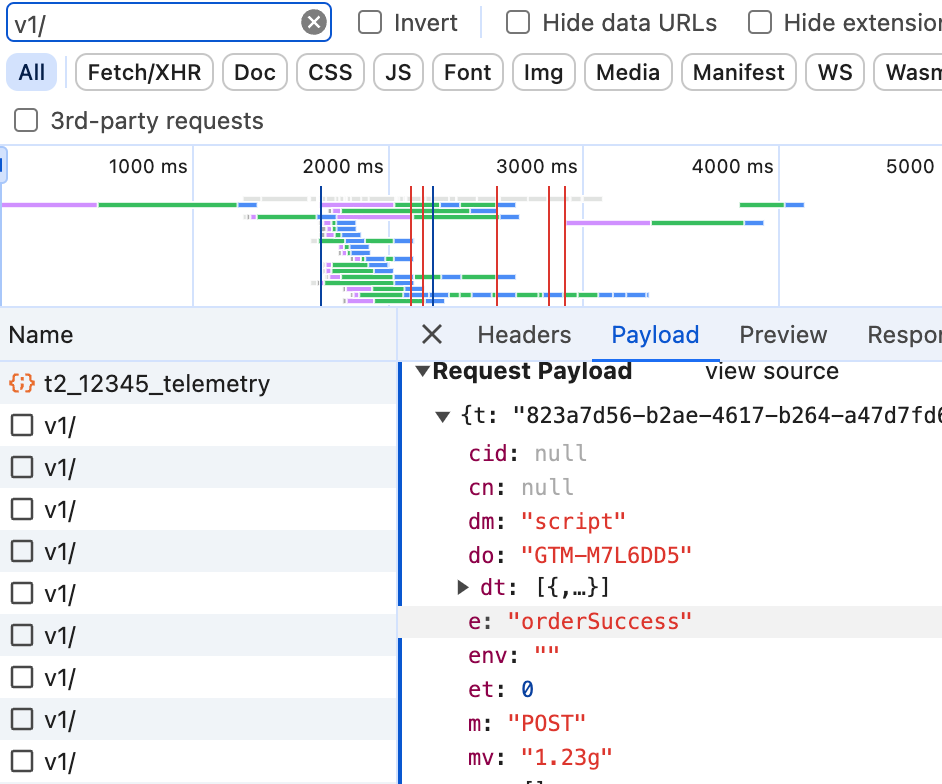
e parameter shown belowCustom Functions
When installing Monita script, you can declare custom functions calculate some fields in the Monita payload. The fields that can be overridden include:- Session ID
sid[get_session_id] - Customer ID
cid[get_customer_id] - Consent
cn[get_consent] - event
e[get_event] (takes vendor name and payload as parameters)
 You can also prevent Monita from executing using a function [
is_monita_allowed] that takes Monita payload as argument and returns true (allowed) or false (not allowed).
If you have specific environment fields, related to a TMS (Tag Management System) not supported by Monita, or other ebvironment fields you want to override, you can sepcify a function [get_tms_data] that takes windowas parameter and return an object of environment fields.
The fields you can override are:
- System
s(e.g.tealium) - System release version
rl(.e.gv1.1.5) - Environment name
env(e.g.prod) - Domain / Container ID …etc
do(e.g.GTM-123456) - Execution time
etin milliseconds (e.g.1733731798766), - Tag ID, where you can tell which “tag” is associated with this vendor event fire (e.g.
110)